

Sprigatito crochet pattern

Back in my day, there was only one generation of Pokemon. Perks of being an elder millenial.
This was a really fun project to make because my good friend Hannah (crafty.crossing) helped with it by making the templates for it! One of the things I absolutely love about running this business is that I’ve been able to “meet” so many friendly & talented people through it that I wouldn’t have met otherwise.
I posted a half-finished version of this in my story on instagram earlier this week. I got a lot of replies along of the lines of, “you work so fast!!”. The reality is: I don’t work fast. I work really, really slowly - this took THREE days to make. By that I mean three FULL days, not just an hour or so here and there throughout the days.
I have a really bad problem with perfectionism. I like to make things as accurate as I possibly can, BUT there’s a downside to it that no one sees. I’m extremely hyper-critical of my work & hold myself to a really high standard, so it takes what feels like forever to finish anything. I find it really difficult to just accept something without trying to improve it somehow or aiming to do better.

Tools&Materials
-Yarn: size 4/worsted weight yarn; one skein of Patons Canadiana “Cherished Green” & (way less than one skein of) “Winter White”, Bernat Super Value “Lush”
-3.5mm crochet hook (sorryyy, the Patons yarn is THIN)
-Stuffing
-Felt: black, grass green, light pink, pink & white
-Scissors
-Stitch marker
-Sewing needle
-A small amount of black yarn or black embroidery floss
-Patience
Notes
*A printable, ad-free version of this pattern can be purchased here
-This pattern is worked in continuous rounds, unless otherwise stated - do not slip stitch/chain one to join at the end of each round
-Using a 3.5mm crochet hook, my personal gauge was: first 5 rounds of the head = 2 inches. My gauge is usually off, so use whatever size of hook needed to get that gauge.
-Finished size = 8.5 inches tall (to the tops of the ears), 9.5 inches long (front of the head to the tail), 7.5 inches wide (whisker to whisker)
Abbreviations
Sc - single crochet
Hdc - half double crochet
Dc - double crochet
Tr - triple crochet
Ch - chain, followed by a number to chain
Inc - increase (single crochet increase, unless otherwise stated)
Dec - decrease
Hdc inc - half double crochet increase (two half double crochet stitches in the same stitch)
Hdc dec - half double crochet decrease (yarn over, decrease & pull through all of the loops on the hook)

Head
Make 6 sc in a magic ring (6)
2. inc x 6 (12)
3. (sc, inc) x 6 (18)
4. sc, inc, (2 sc, inc) x 5, sc (24)
5. (3 sc, inc) x 6 (30)
6. 2 sc, inc, (4 sc, inc) x 5, 2 sc (36)
7. (inc, 5 sc) x 6 (42)
8. 3 sc, inc, (6 sc, inc) x 5, 3 sc (48)
9. sc in each stitch (48)
10. (7 sc, inc) x 6 (54)
11. sc in each stitch (54)
12. (inc, 8 sc) x 6 (60)
13. sc in each stitch (60)
14. (14 sc, inc) x 4 (64)
15-20. sc in each stitch (64)
21. (dec, 14 sc) x 4 (60)
22. sc in each stitch (60)
23. (8 sc, dec) x 6 (54)
24. sc in each stitch (54)
25. (7 sc, dec) x 6 (48)
26. 3 sc, dec, (6 sc, dec) x 5, 3 sc (42)
27. (dec, 5 sc) x 6 (36)
28. 2 sc, dec, (4 sc, dec) x 5, 2 sc (30)
29. (3 sc, dec) x 6 (24)
Add stuffing to the head & shape it like an oval. Two of the four increases from round 14 should be at each side of the oval shape.
30. sc, dec, (2 sc, dec) x 5, sc (18)
31. (sc, dec) x 6 (12)
32. decrease six times (6)
Fasten off, leaving a tail. Weave the tail through the front loops of the remaining stitches & pull to close the ring.
Front legs
**Make the front legs before making the body
Make two in “Cherished Green”
1. Make 5 sc in a magic ring (5)
2. increase in each stitch (10)
3. in the back loop only: 10 sc (10)
4. no longer working in the back loop: 10 sc (10)
5. 3 sc, dec, dec, 3 sc (8)
6-8. sc in each stitch (8)
9. inc, 3 sc, inc, 3 sc (10)
10. sc 9 & leave the last stitch unworked (9)
Place a stitch marker in the fourth stitch. Add stuffing to the legs.
Body
Make 8 sc in a magic ring (8)
2. increase in each stitch (16)
3. (sc, inc) x 8 (24)
4. (inc, 2 sc) x 8 (32)
5-9. sc in each stitch (32)
10. 3 sc, dec, (6 sc, dec) x 3, 3 sc (28)
11-12. sc in each stitch (28)
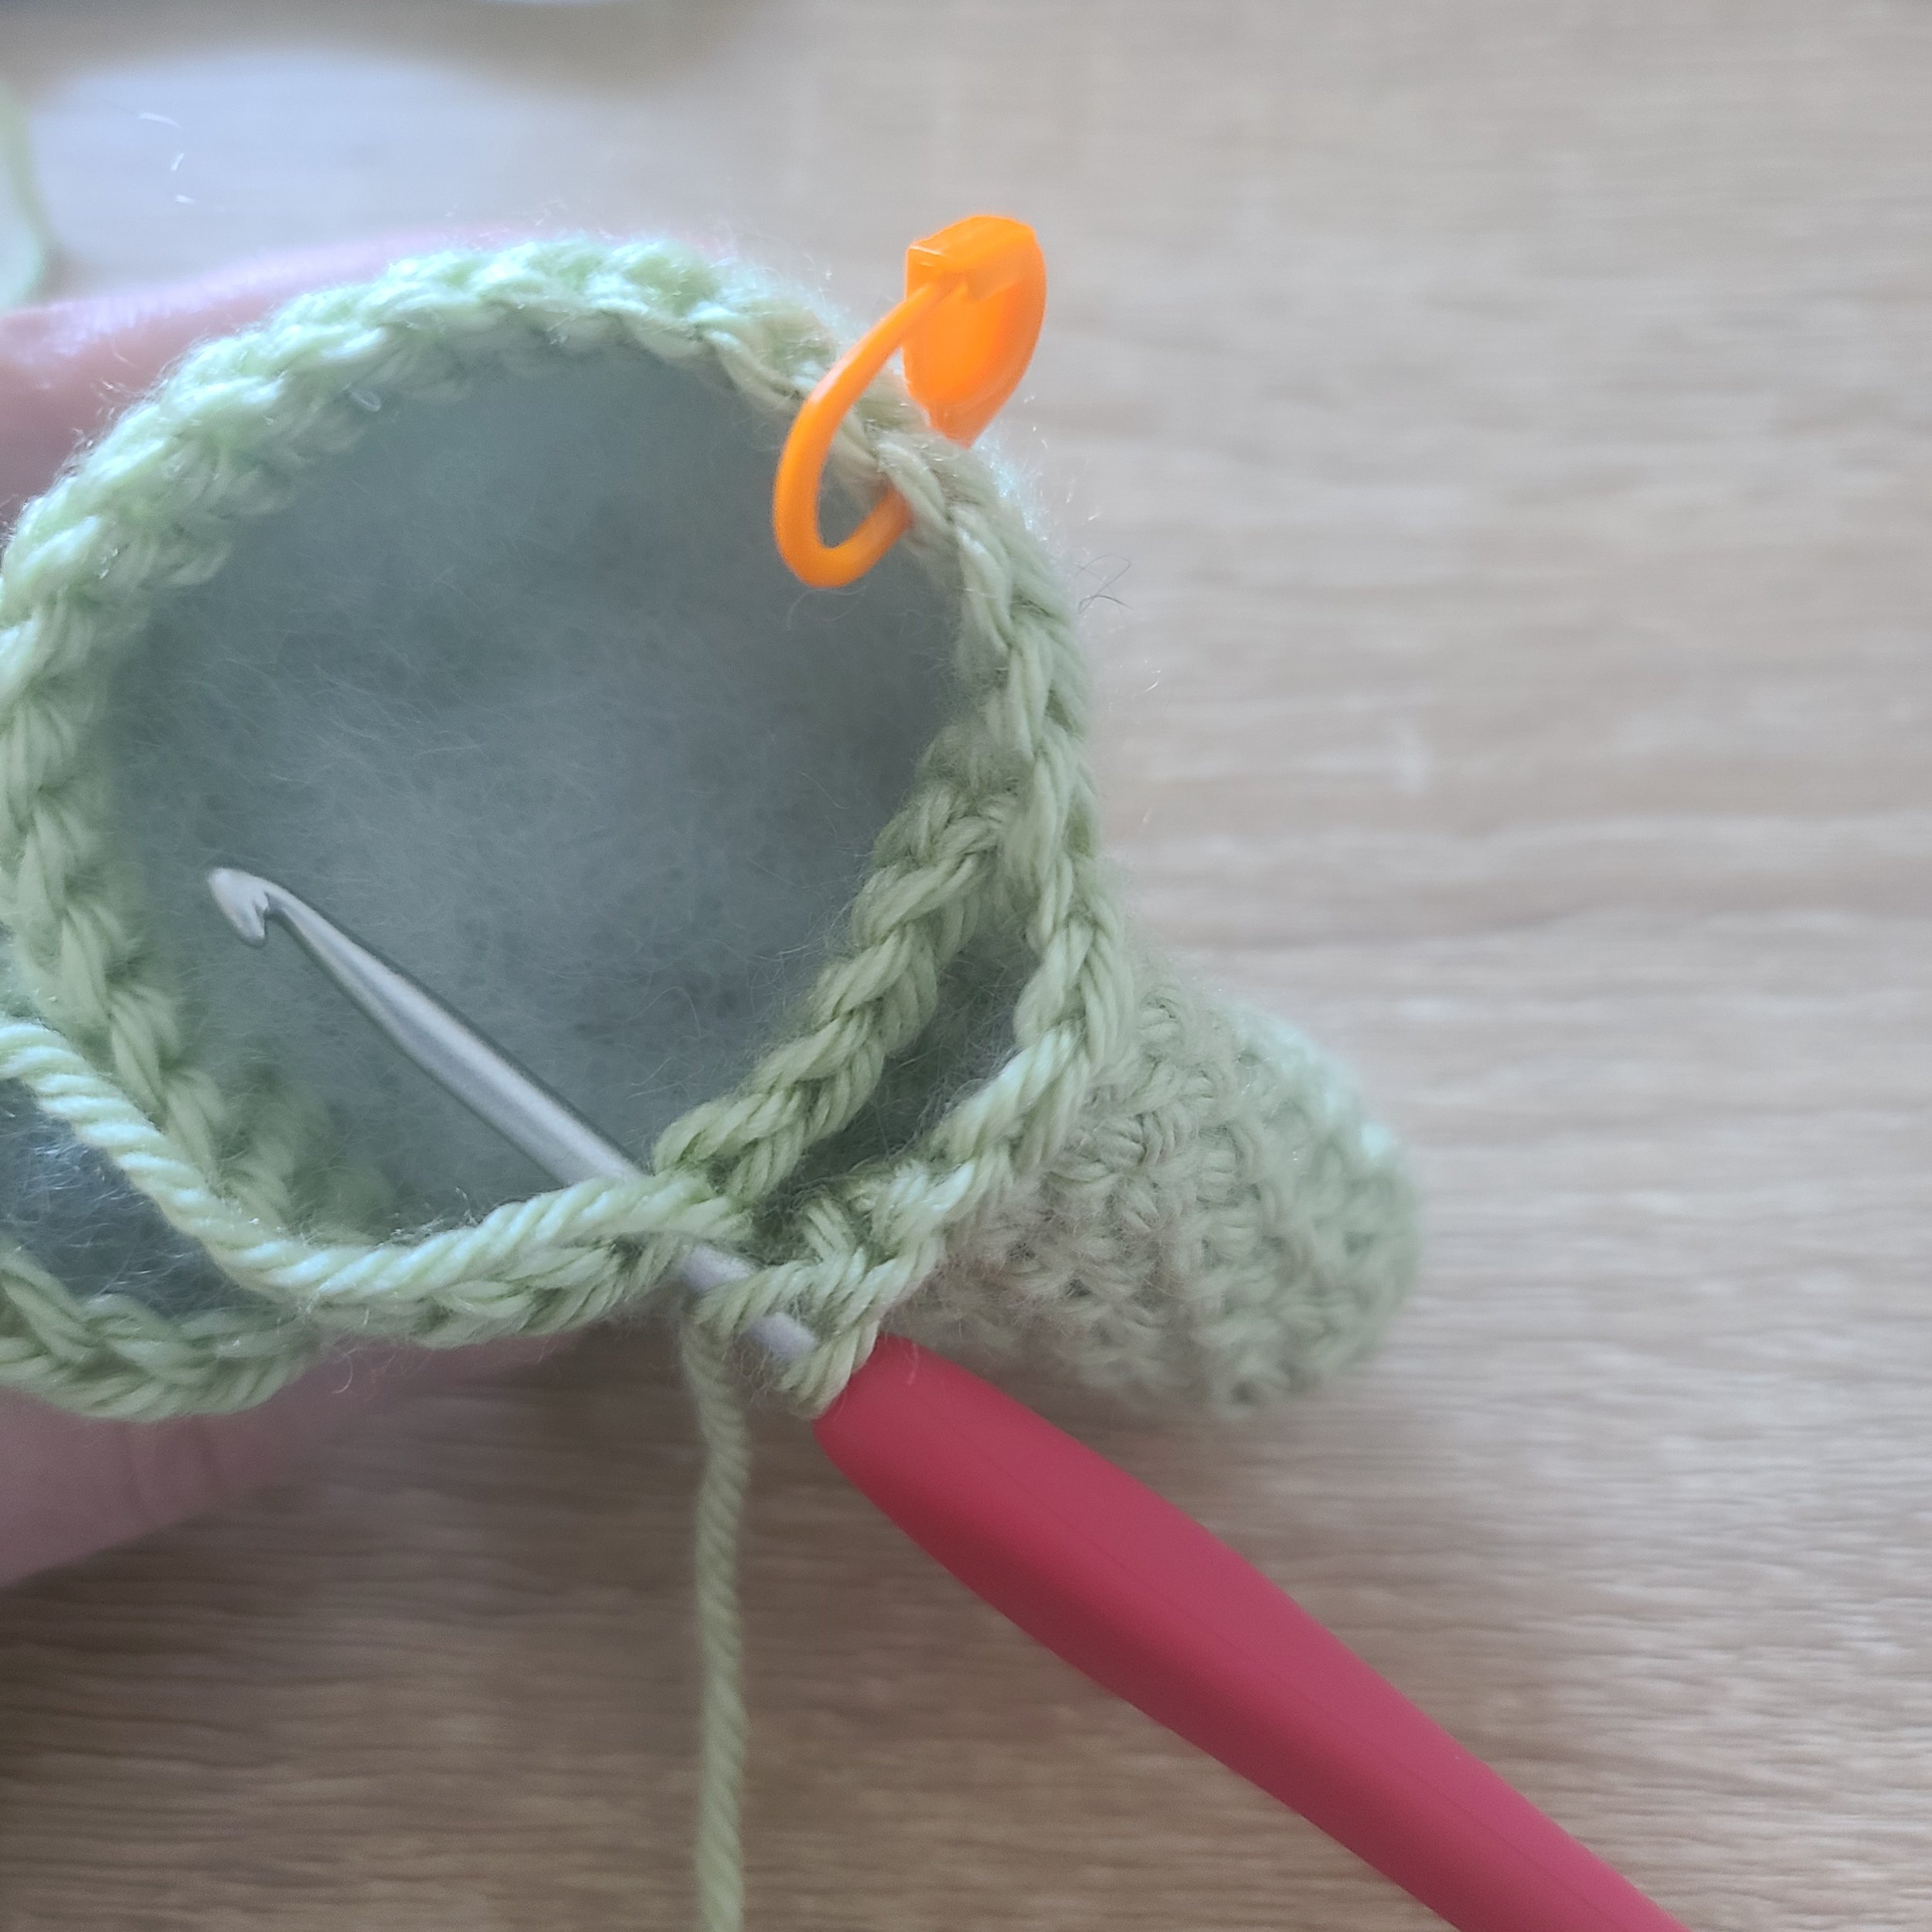
13. 4 sc. Insert your hook through the fourth stitch on one of the legs & then through the next stitch on the body. Make 4 sc through the leg & body this way (see image below). 3 sc on the body. Make 4 sc through the second front leg & body. 13 sc through the body (28)


14. sc in each stitch (28) note: this round goes around the body & in the stitches just made on the front legs (see pic below)

15. 4 sc. Insert your hook through the fifth stitch on the first front leg & make: 2 sc, dec, 2 sc on the first leg. Skip four stitches on the body & make 3 hdc in the 3sc stitches from the previous round. Insert your hook into the fifth stitch on the second leg & make: 2 sc, dec, 2 sc. Skip four stitches on the body & sc 13. (30)
16. 3 sc, dec, 3 sc, 5 hdc, 3 sc, dec, 14 sc (28)
17. 5 sc, dec, 5 hdc, dec, 5 sc, dec, 5 sc, dec (24)
18. sc, 11 hdc, 12 sc (24)
Fasten off, leaving a long tail to sew to the head.


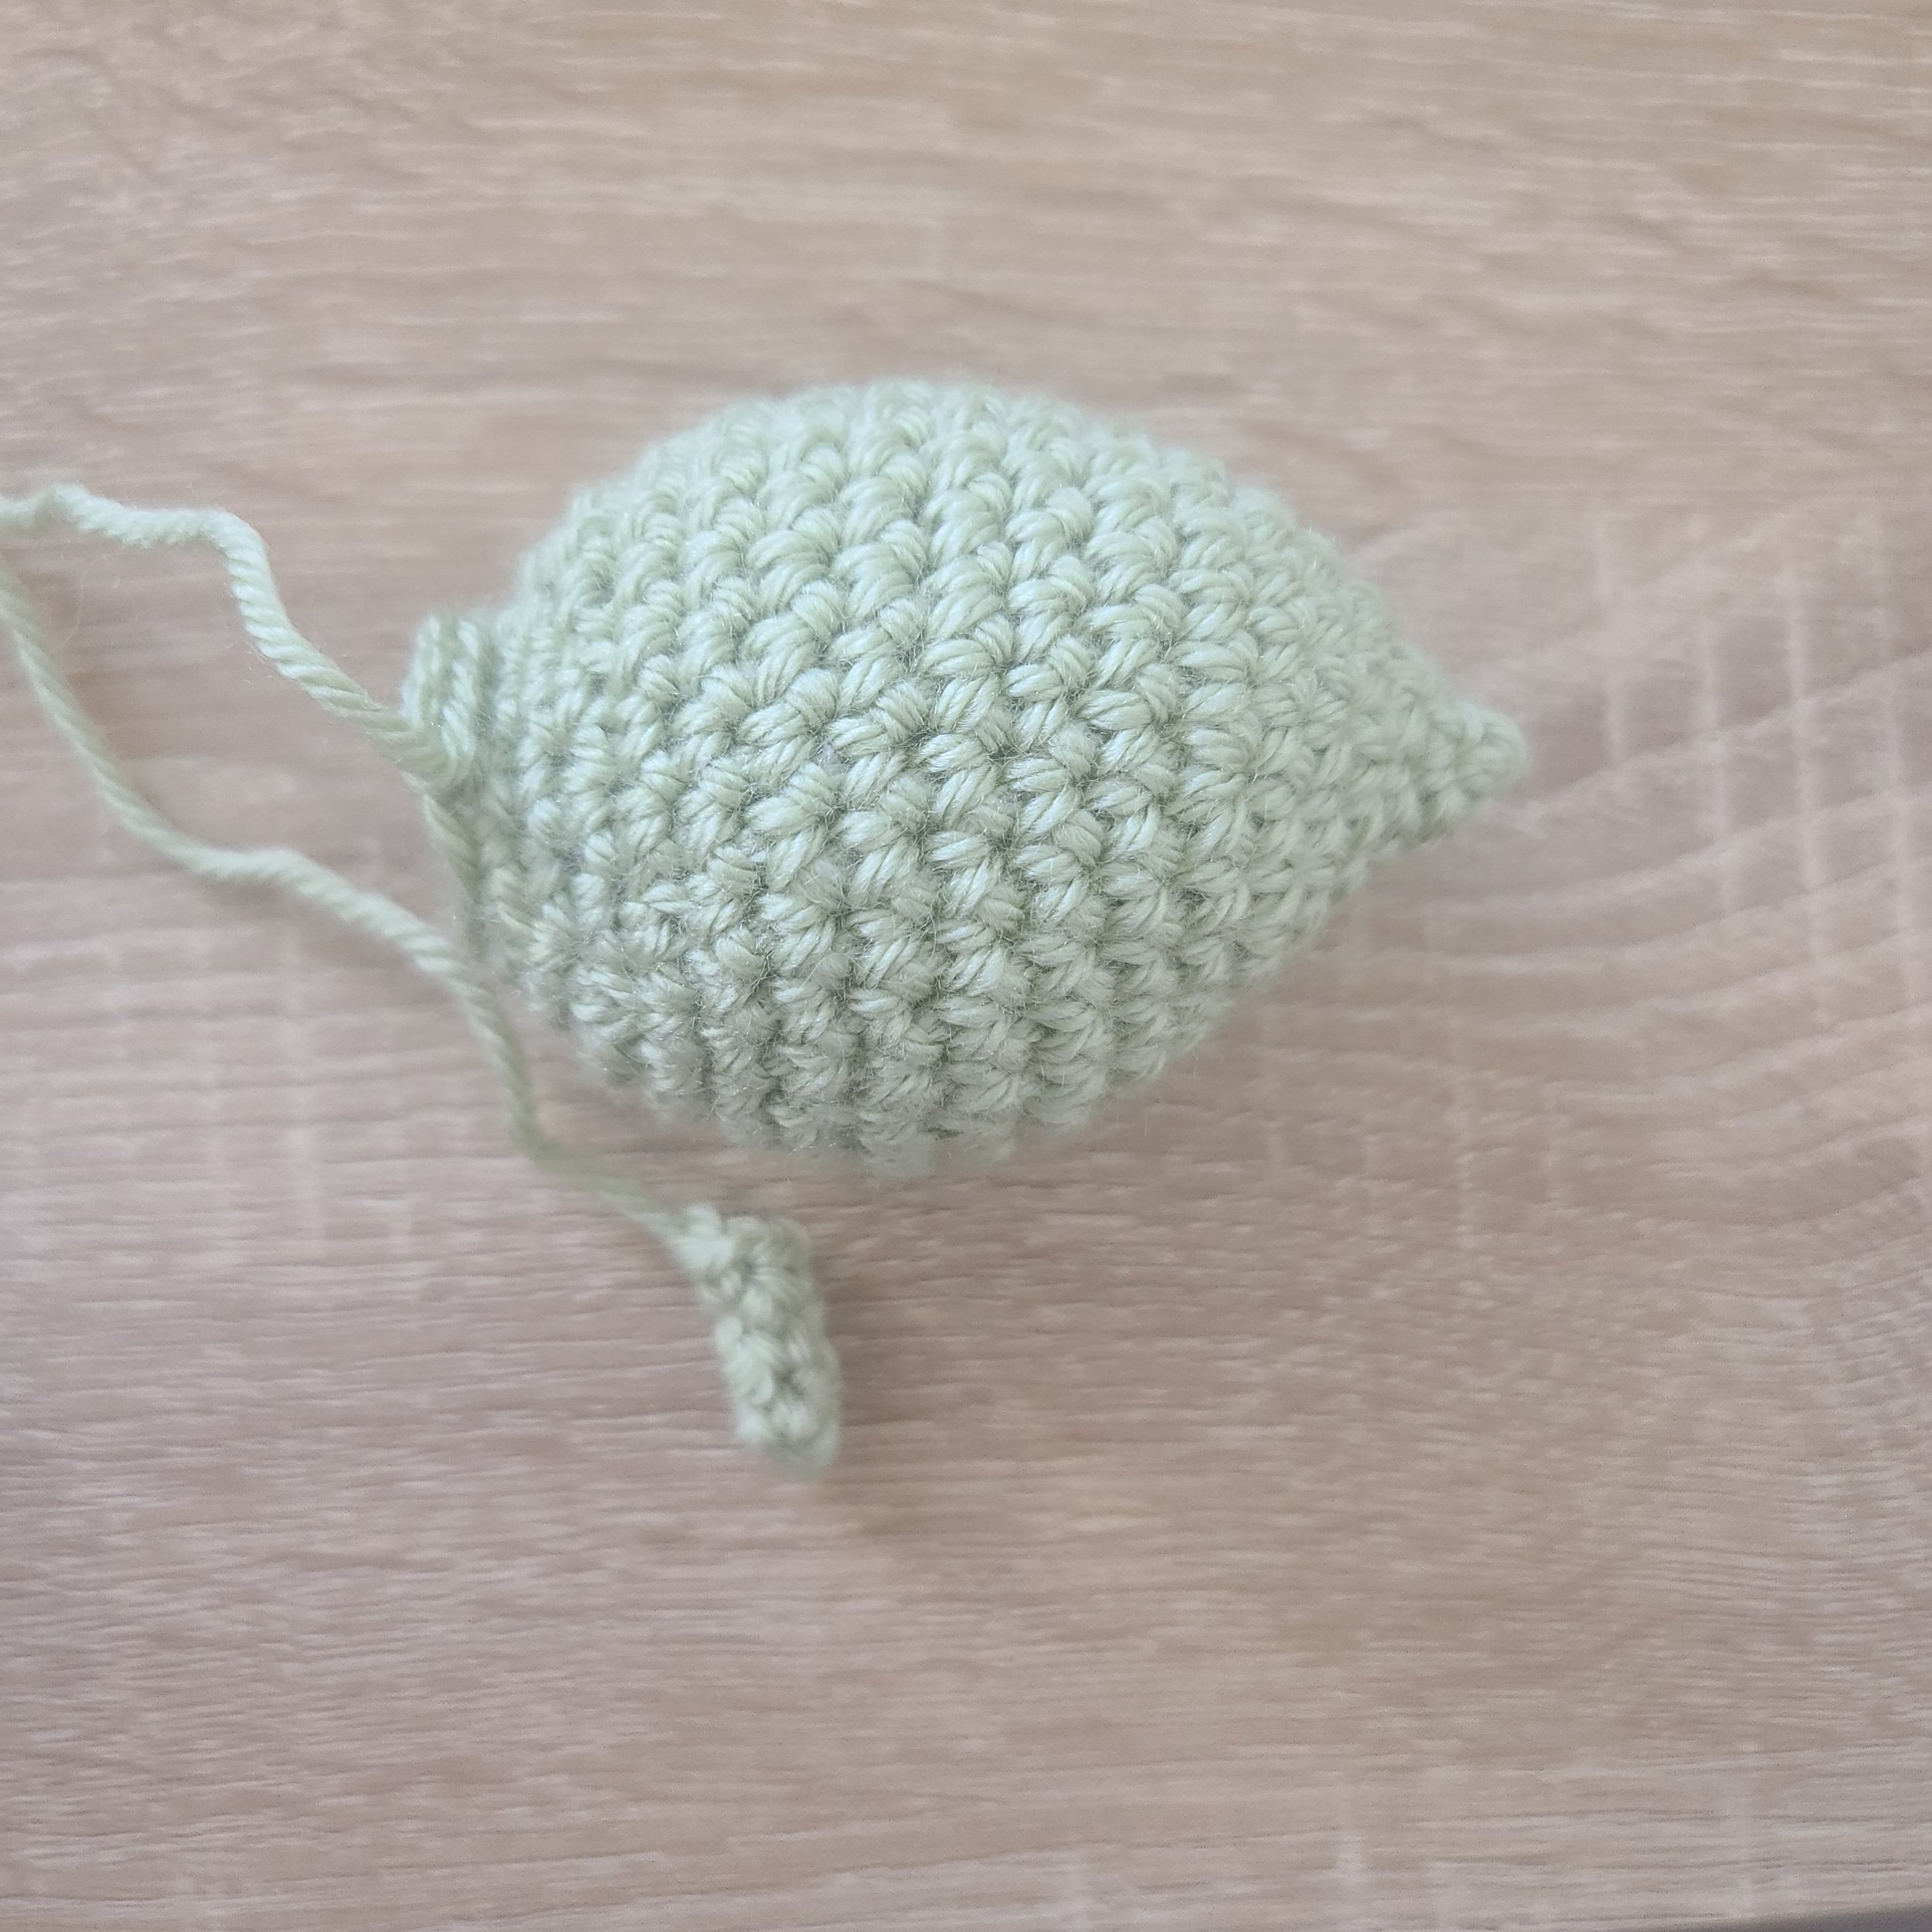
Tail
In “Cherished Green”
1. Make 4 sc in a magic ring (4)
2. sc, inc, inc, sc (6)
3. 2 sc, inc, inc, 2 sc (8)
4. (sc, inc) x 4 (12)
5. (sc, inc) x 6 (18)
6. (5 sc, inc) x 3 (21)
7. 3 sc, inc, 6 sc, inc, 6 sc, inc, 3 sc (24)
8. inc, inc, inc, 21 sc (27)
9. sc in each stitch (27)
10. sc, inc, sc, inc, sc, inc, 21 sc (30)
11-12. sc in each stitch (30)
13. sc, dec, sc, dec, sc, dec, 21 sc (27)
14. (7 sc, dec) x 3 (24)
15. 2 sc, dec, (4 sc, dec) x 3, 2 sc (20)
16. (3 sc, dec) x 4 (16)
17. 3 sc, dec, 6 sc, dec, 3 sc (14)
18. 5 sc, dec, 5 sc, dec (12)
Fasten off, leaving a tail to sew to the body. Add stuffing to the tail.
Piece two:
Make 3 sc in a magic ring (3)
2. inc, 2 sc (4)
3-4. sc in each stitch (4)
Fasten off, leaving a tail to sew to the tail.
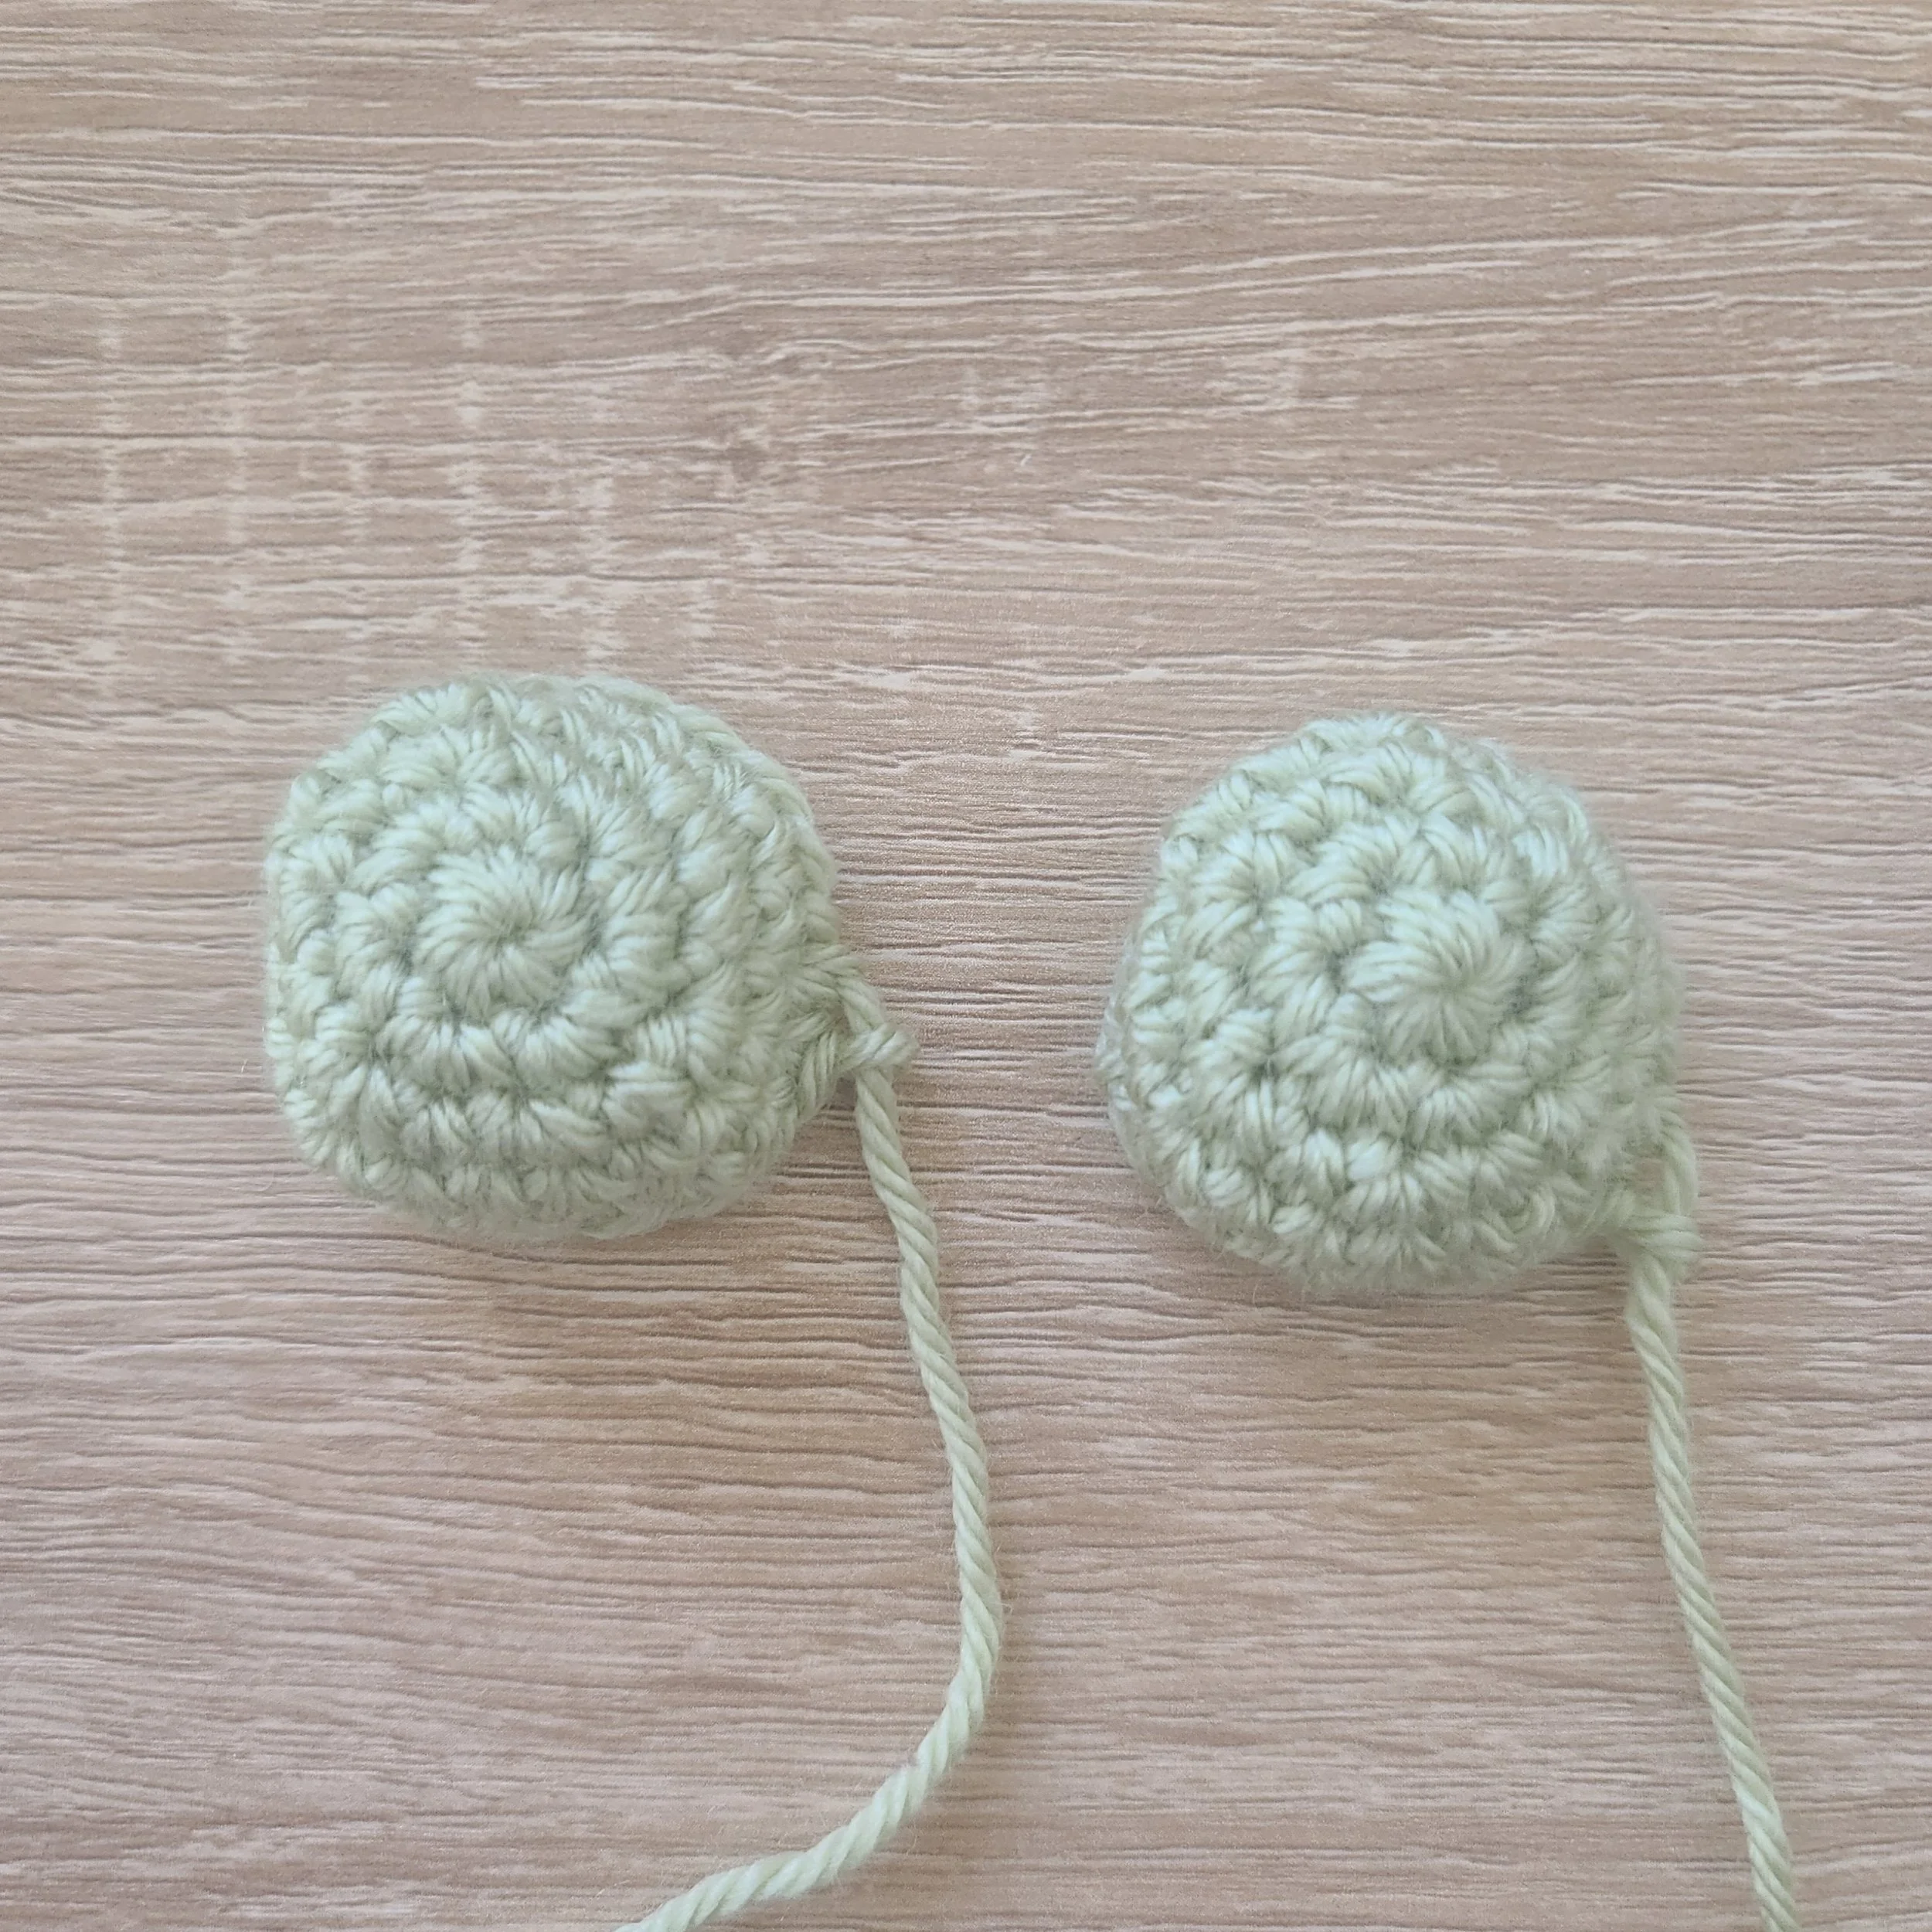
Ears
Make two in “Lush”
1. Make 4 sc in a magic ring (4)
2. increase in each stitch (8)
3. inc, 3 sc, inc, 3 sc (10)
4. 2 sc, inc, 4 sc, inc, 2 sc (12)
5. inc, 5 sc, inc, 5 sc (14)
6. 3 sc, inc, 6 sc, inc, 3 sc (16)
7. 7 sc, inc, 7 sc, inc (18)
8. 4 sc, inc, 8 hdc, increase (single crochet), 4 sc (20)
9. inc, 4 sc, 5 hdc, *hdc inc*, 4 hdc, increase (single crochet), 5 sc (22)
Fasten off, leaving a long tail to sew to the head.
Inner ears
Make two in “Cherished Green”
1. Make 6 sc in a magic ring (6)
2. sc, (hdc, dc, hdc) in the next stitch, sc, (dc, tr, dc) in the next stitch, sc, (hdc, dc, hdc). Slip stitch to the first stitch (12)
Fasten off, leaving a long tail to sew to the ear.

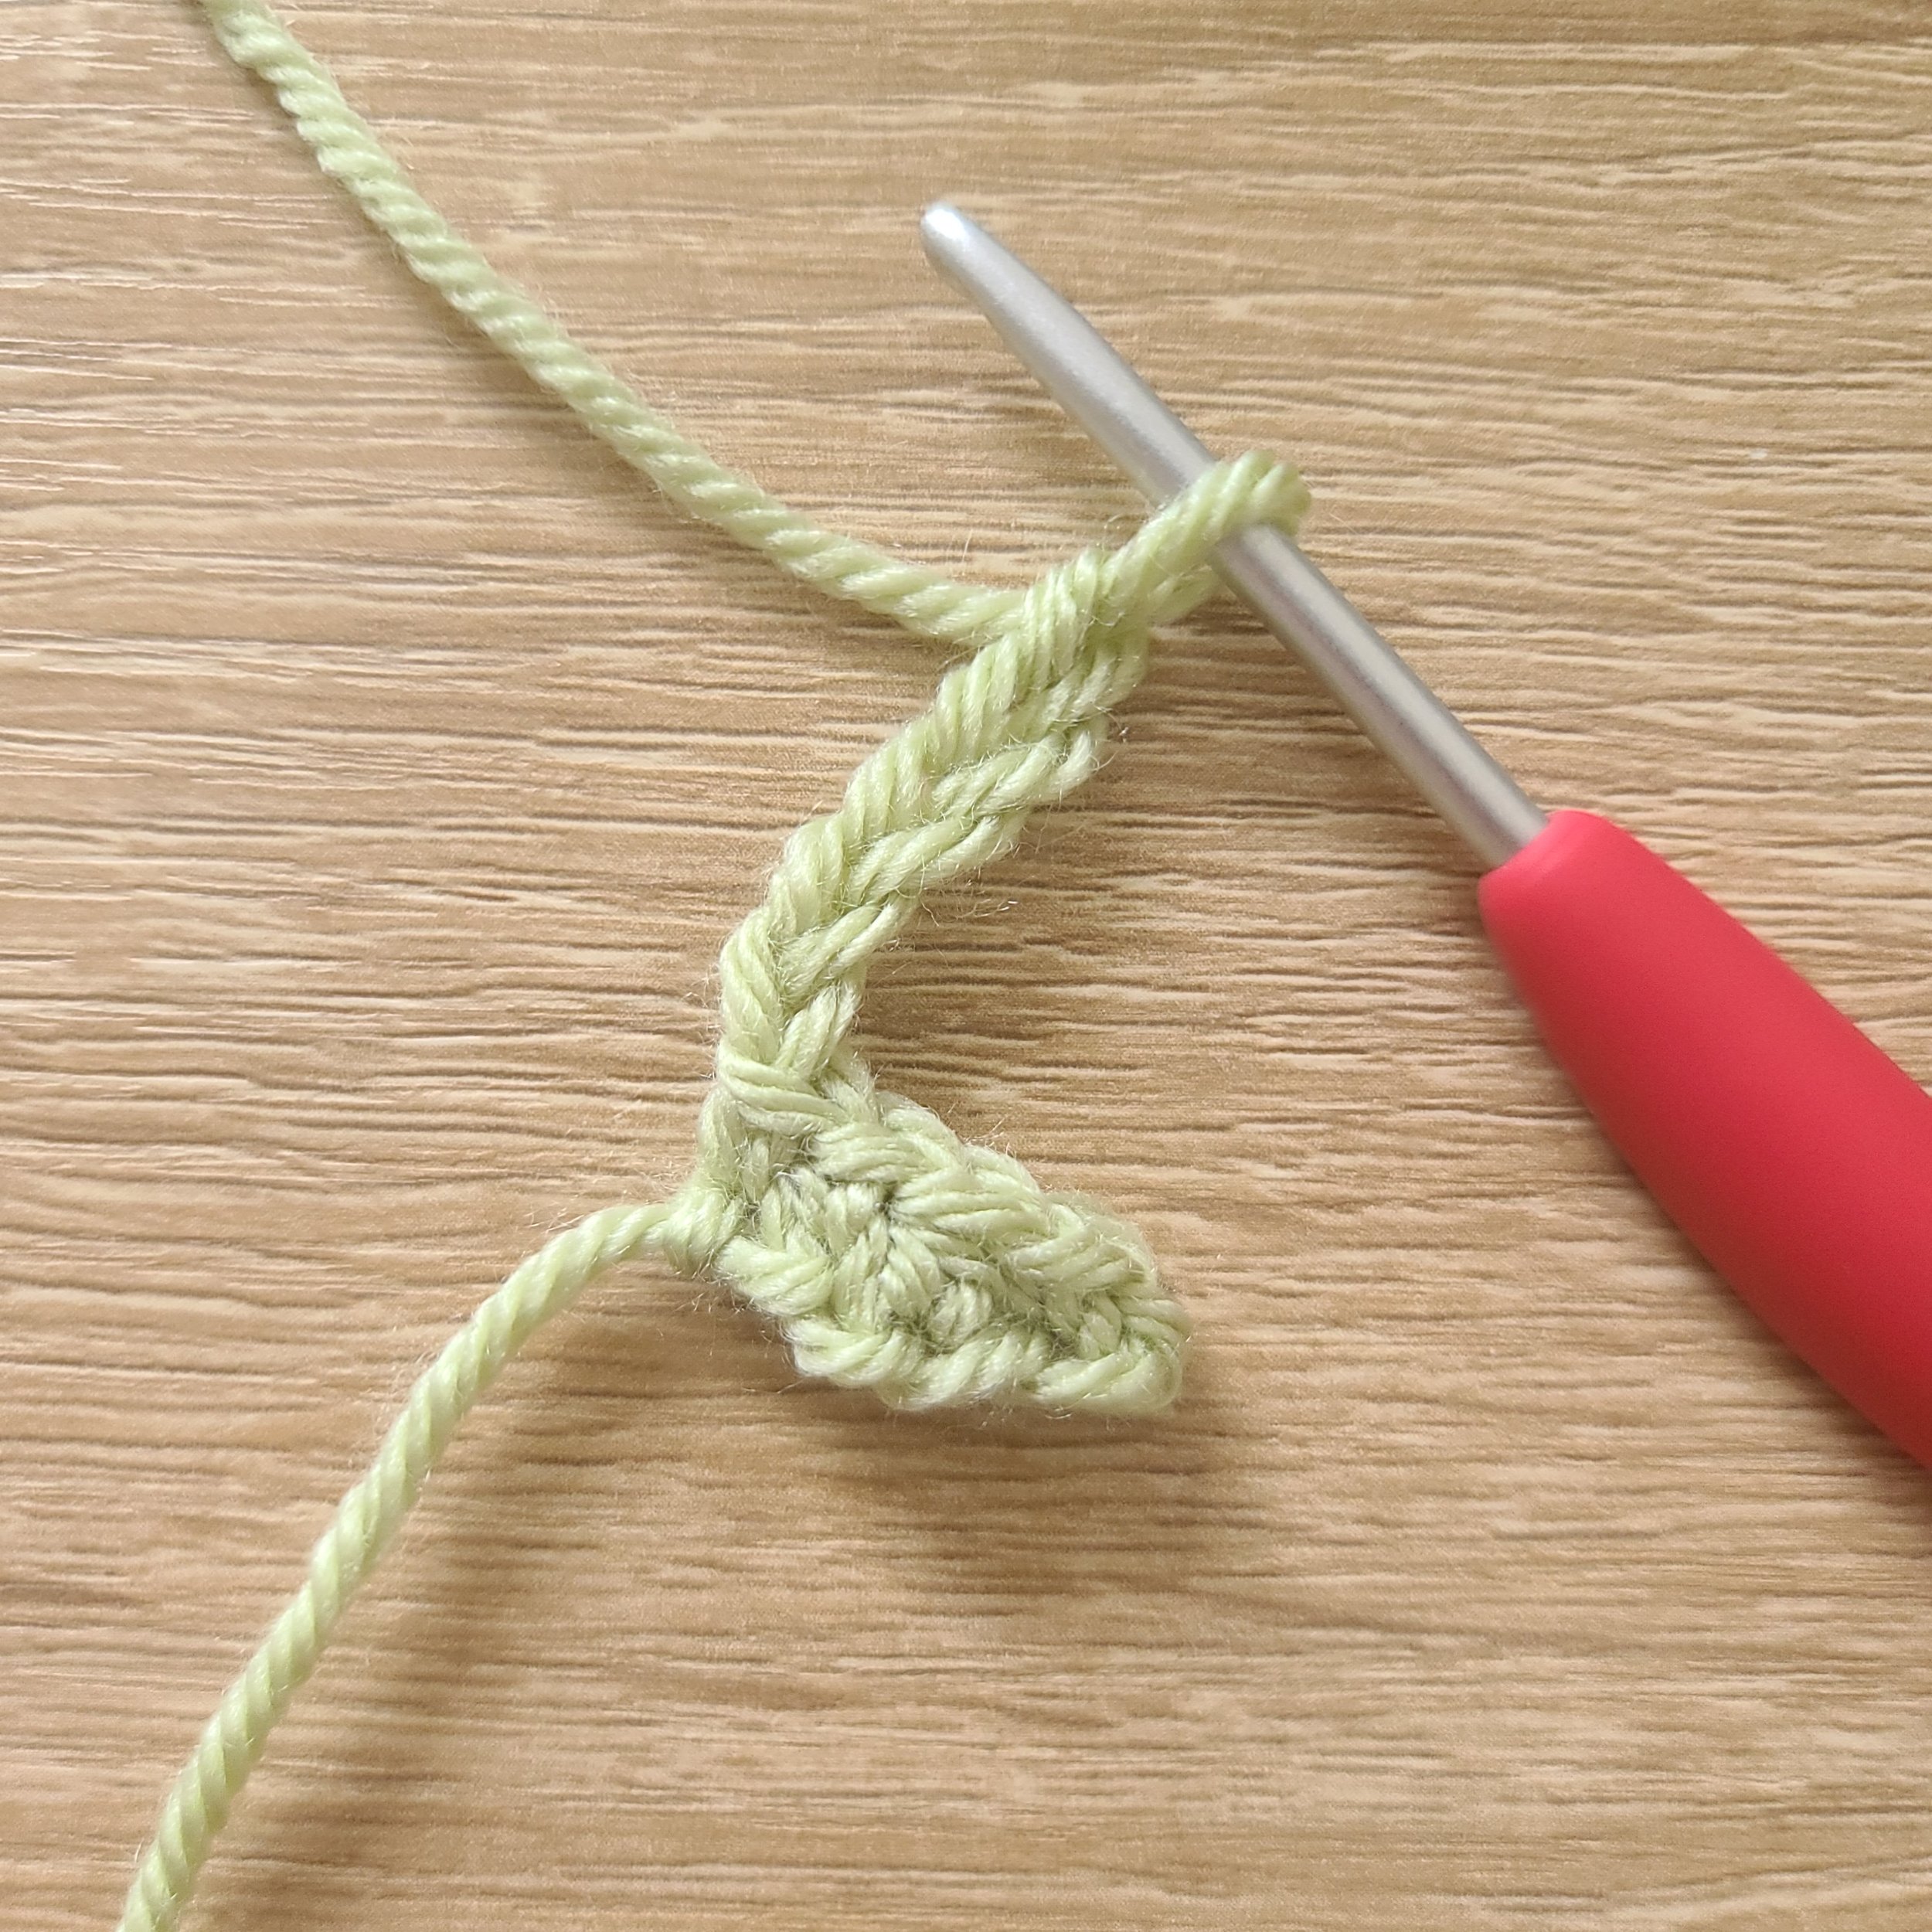
Whiskers
Made in 3 pieces (a, b & c)
Joining pieces tutorial can be found here
Piece A - starting in “Winter White”
Make 4 sc in a magic ring (4)
2. inc, 3 sc (5)
3. inc, 4 sc (6)
Change colour to “Cherished Green”
4. inc, 2 sc, dec, sc (6)
5. sc in each stitch & slip stitch in the first stitch (6)
Fasten off, leaving a tail.
Piece B - starting in winter white
Make 4 sc in a magic ring
Change colour to green
2-4. 4 sc (4)
Fasten off, leaving a tail
Piece C - starting in winter white
Make 4 sc in a magic ring (4)
2. inc, 3 sc (5)
3. inc, 4 sc (6)
Change colour to cherished green
4. inc, 2 sc, dec, sc (6)
5. sc in each stitch (6)
6. 4 sc on piece C. 2 sc in piece B. 6 sc around piece A. 2 sc on piece B. 2 sc on piece C. (16)
7. dec, sc, hdc, hdc decrease, hdc, sc, dec, sc, hdc, hdc decrease, hdc, sc (12)
Fasten off, leaving a tail.
Feet&legs
Feet – make two in “Cherished green”:
1. Make 8 sc in a magic ring (8)
2-3. Sc in each stitch (8)
4. 3 sc, dec, 3 sc, dec (6)
Fasten off, leaving a tail to sew to the leg.
Legs – make two in “Cherished Green”:
1. Make 6 sc in a magic ring (6)
2. Increase in each stitch (12)
3. (inc, sc) x 6 (18)
4. (2 sc, inc) x 6 (24)
5. 4 sc, dec, (sc, dec) x 5, 3 sc (18)
Fasten off, leaving a long tail to sew to the body.
Front piece
*in “Cherished Green”
1. Chain 5. Starting in the second chain from the hook: sc, hdc, sc, sc, chain 5 (4)
2. Starting in the second chain from the hook: sc, hdc, sc, sc, chain 5 (4)
3. Starting in the second chain from the hook: sc, hdc, sc, sc, chain one & turn so you’re working along the edge of the piece (4)
4. Make 3 sc along the edge of the piece (3)
Fasten off, leaving a tail to sew to the body.


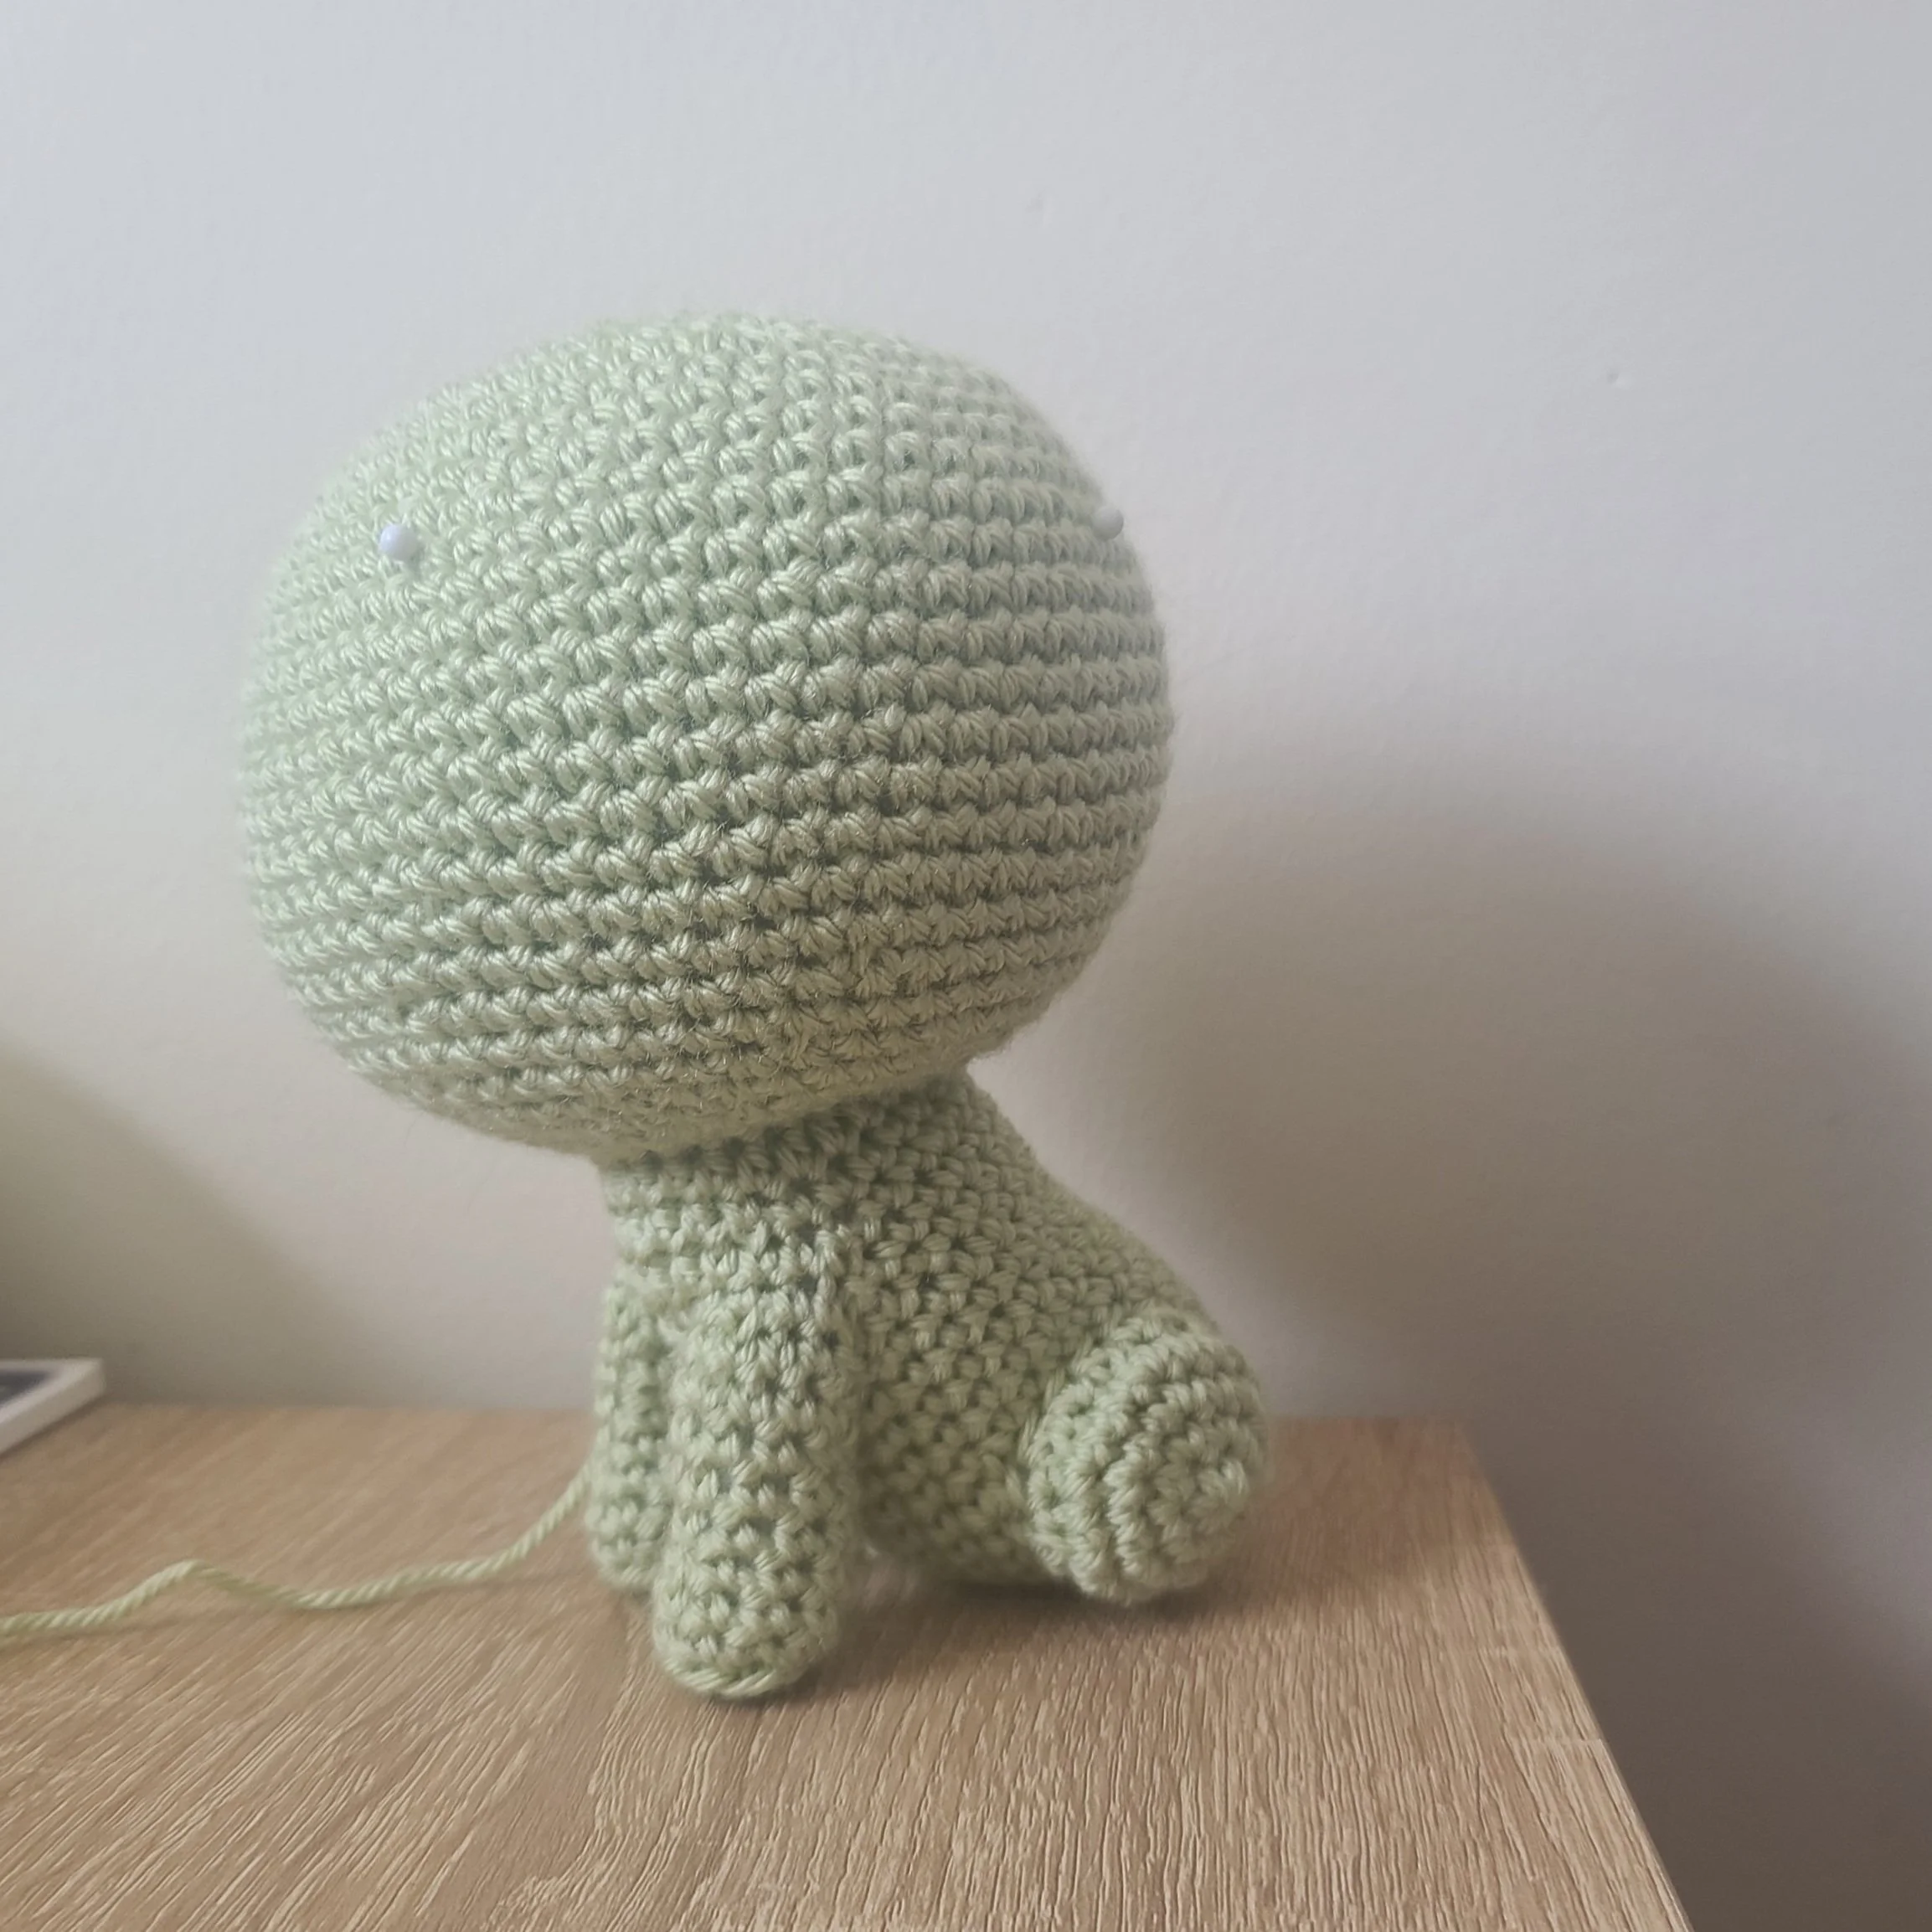
Assembly
· Place pins in the increases from round 14 of the head.
This will help with sewing/creating the face.
The bottom of the picture on the right is the front of the head/face.

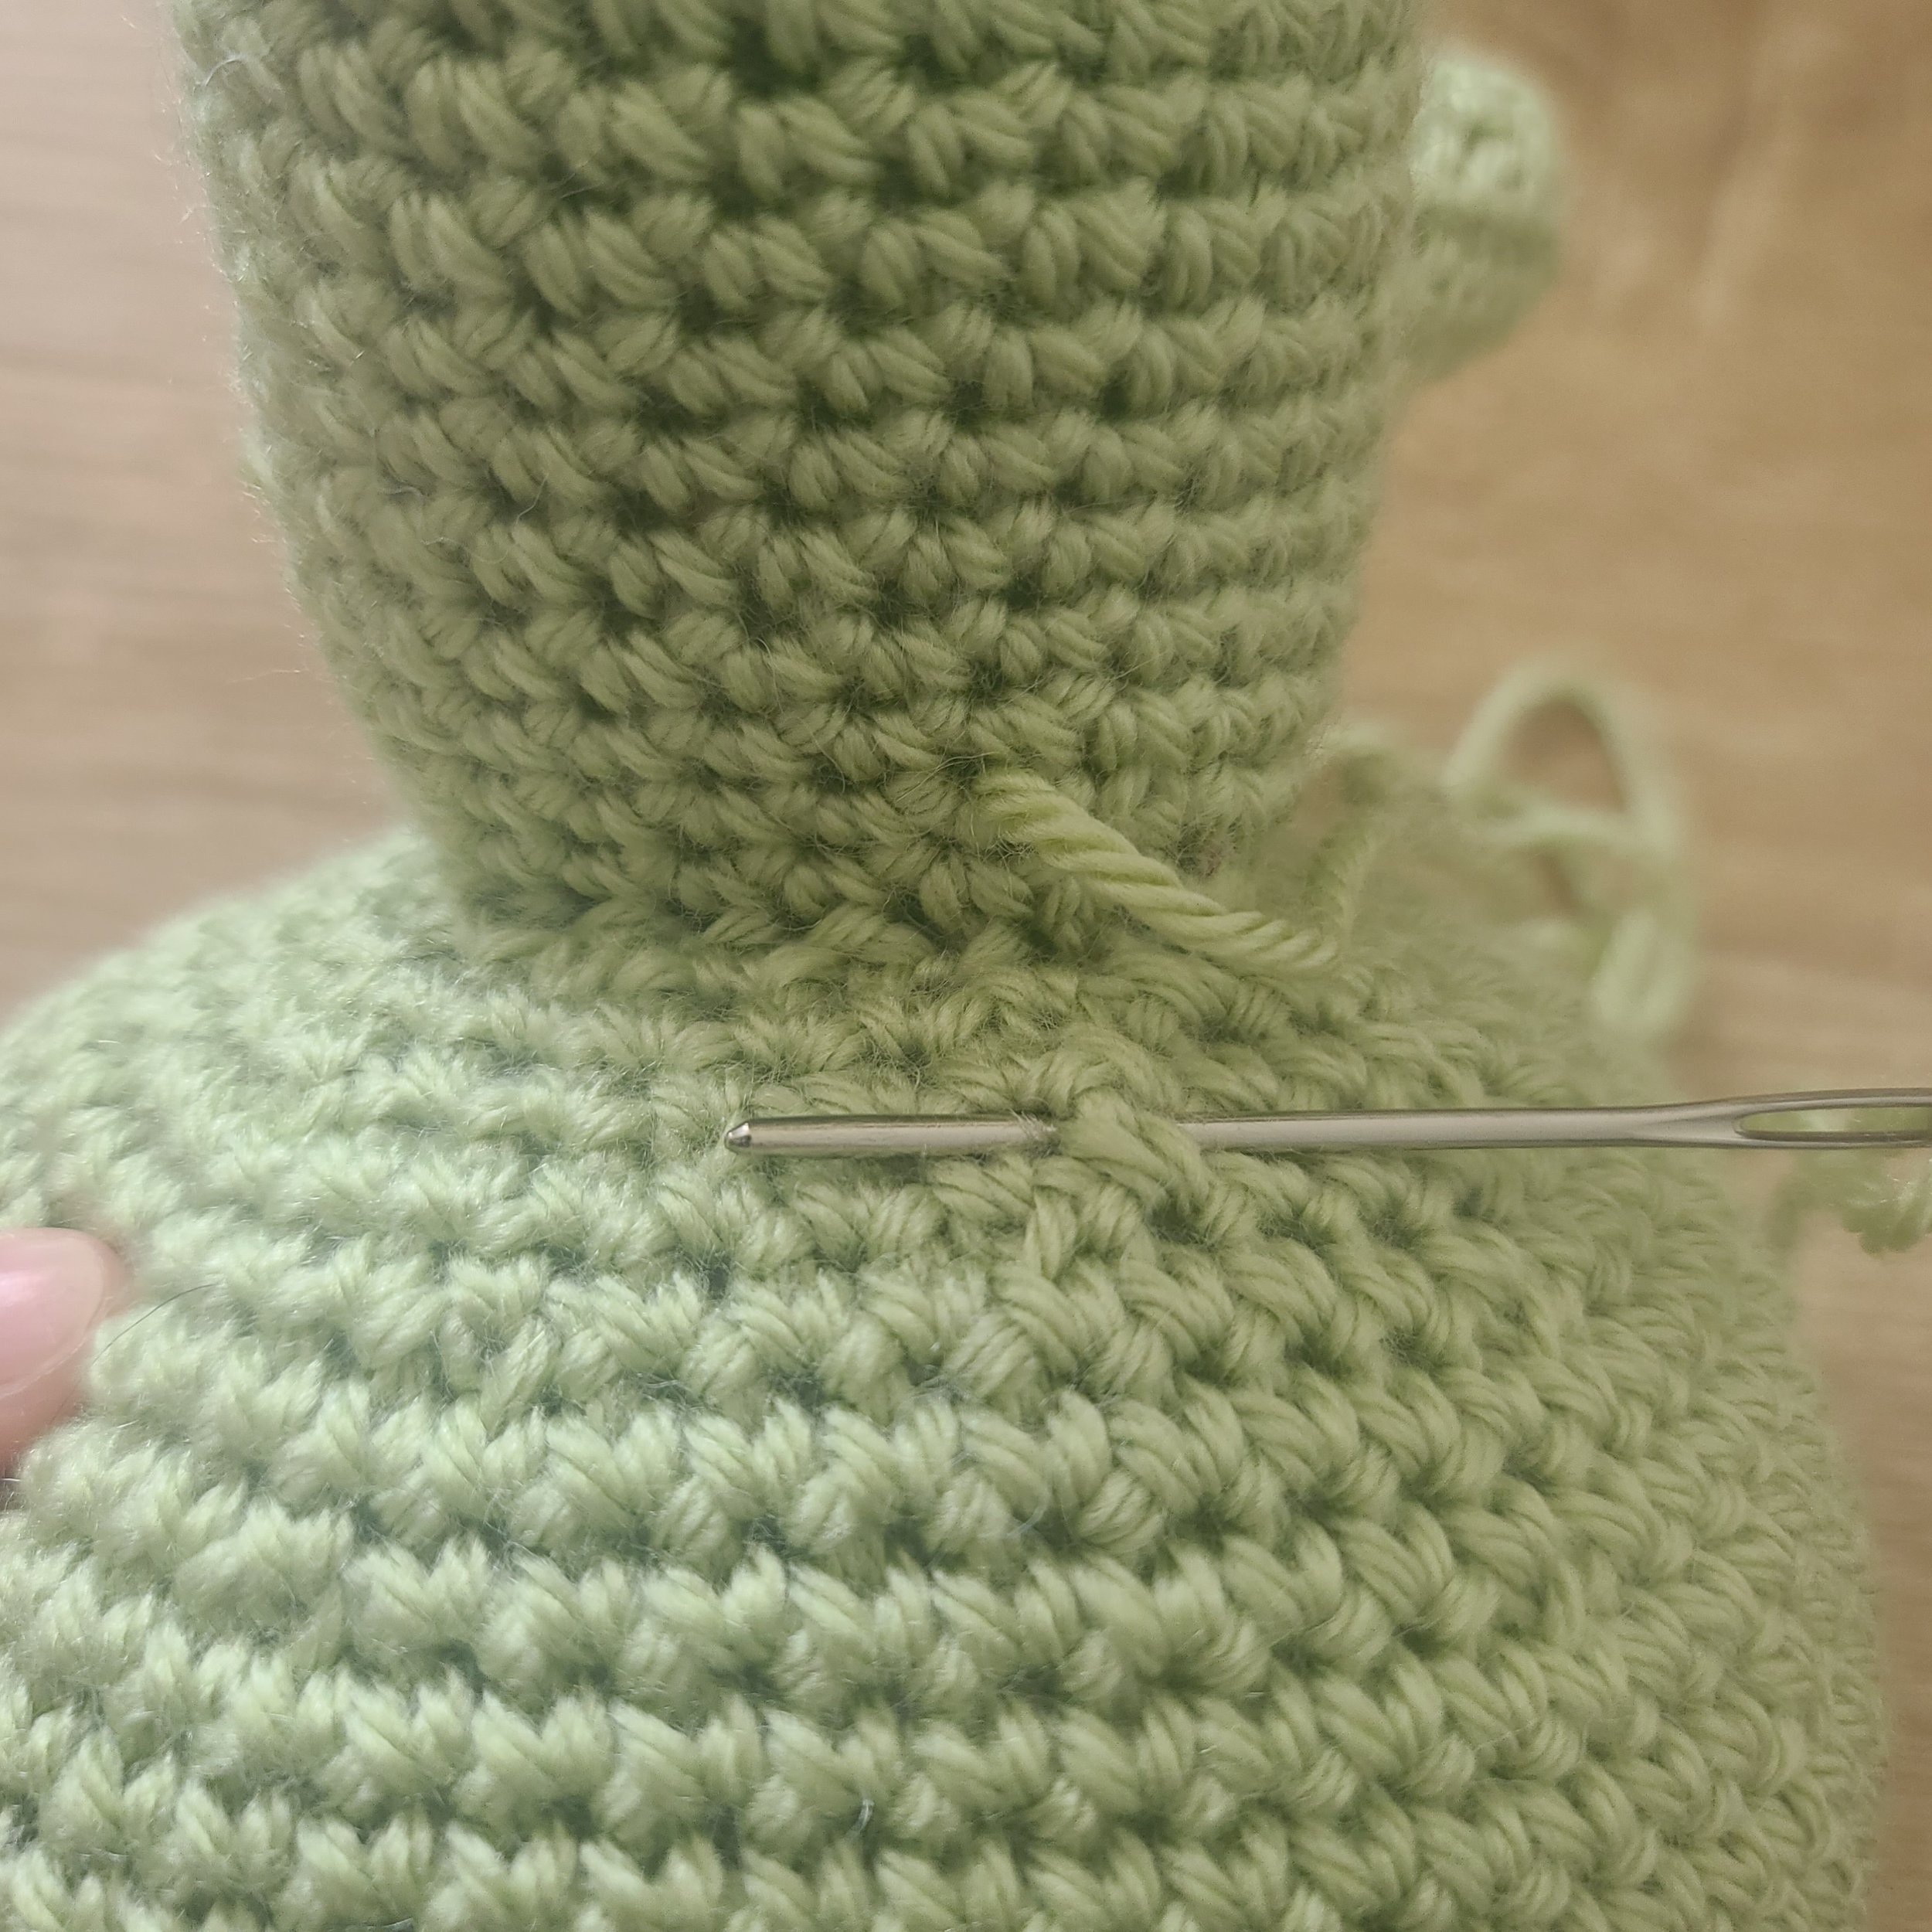
· Using the tail left on the body, sew the body to the head. Do not cut the tail.
· Next, weave the tail through to the back of the body, between the second & third last rounds of the body.
Insert your sewing needle around one of the posts of the stitches on the head & then back through the same round on the body.
Insert your sewing needle around of the posts of the stitches on the body & back around one of the posts of the stitches on the head.
Repeat this a few times so the head tilts back a bit.
· Using the tails left over on the front legs, sew the gaps at each of the sides of the legs closed.
· Next, weave the tail 2 rounds below where the front legs are joined at the bottoms.
Sew around 1-2 of the posts of the stitches on the front legs so that they are more secured to the body.


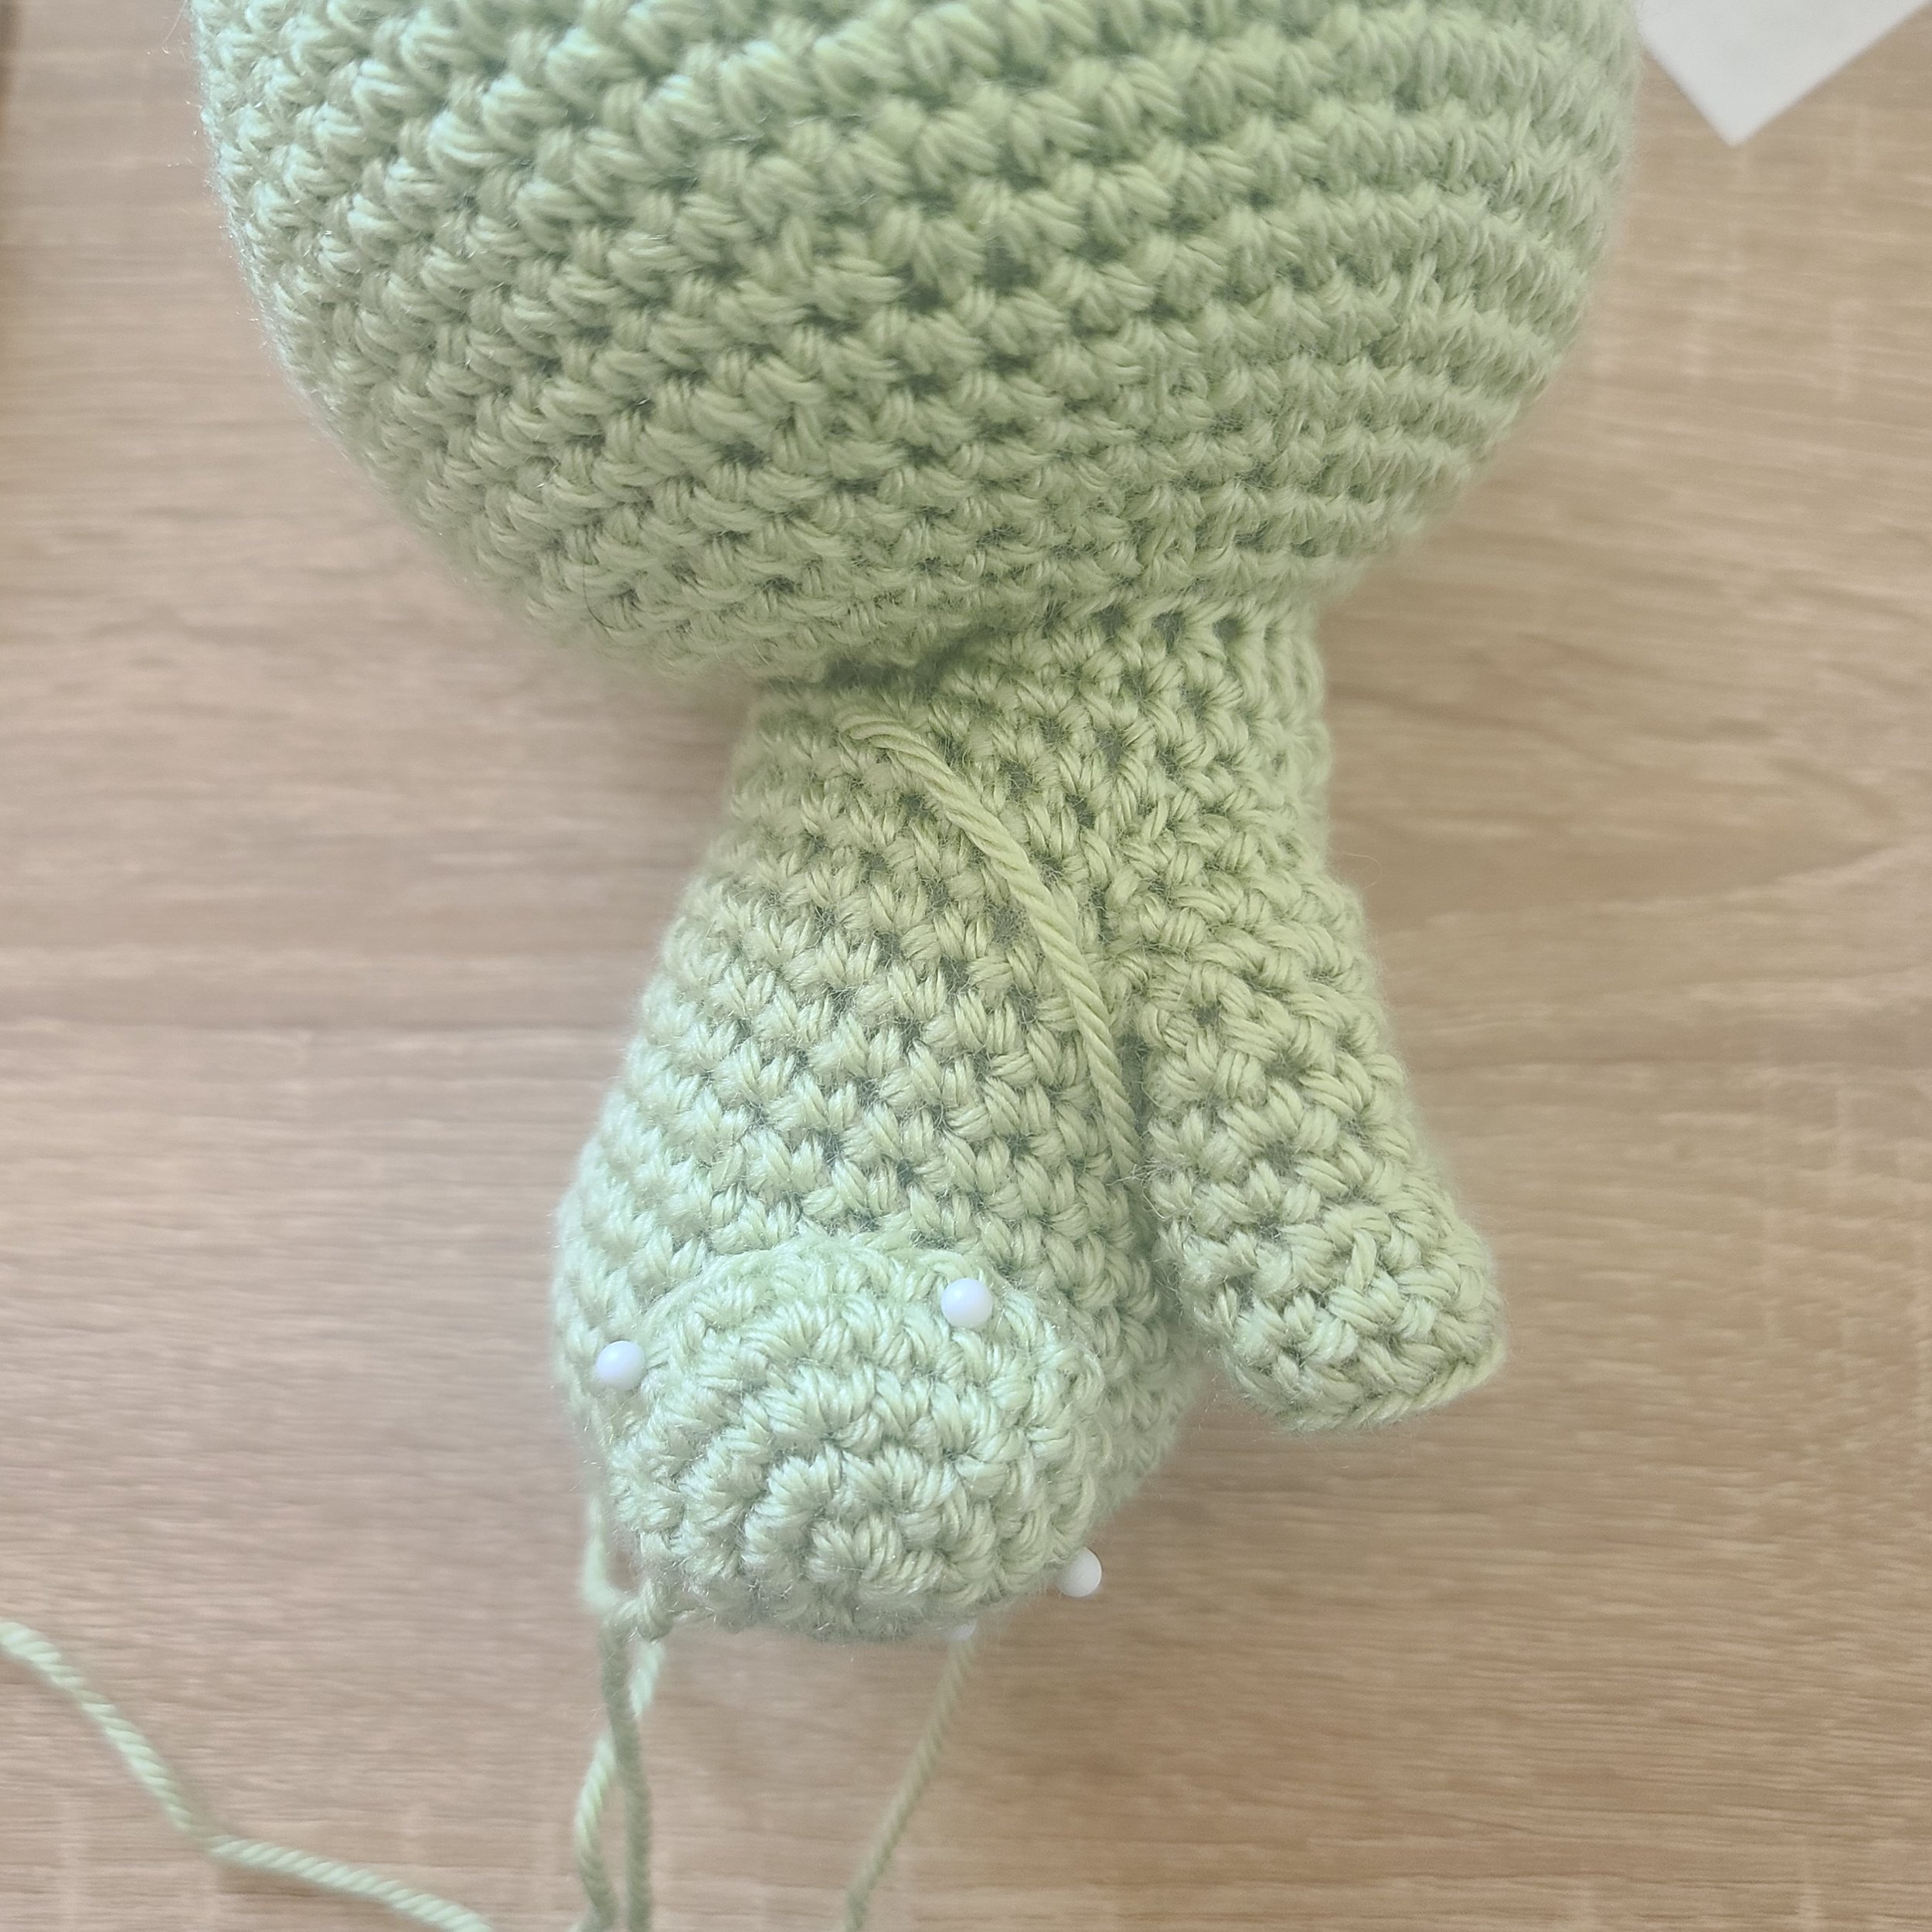
· Pin the back legs to each side of the body.
The bottoms of the back legs should sit between rounds 4&5 of the body.
The tops of the back legs should sit between rounds 10&11 of the body.
· Sew the back legs to the body & add stuffing as the pieces are more attached.
· Add a bit of stuffing to the feet & pin them to the back legs.
· Sew the feet to the back legs.

· Sew the ear inlays to the ears. The half double crochet stitches should be on opposite sides on each ear (on the left side on the left ear, on the right side on the right ear).
· Pin the ears between rounds 2&3 of the head to between rounds 12&13 of the head.
· Sew the ears flat to the top of the head, by working through two stitches at once (see image below)

· Using the templates below:
Cut the large “leaf” pieces out of grass green felt.
Cut the large ovals of the eyes out of white felt (x2).
Cut the second largest ovals of the eyes out of pink felt (x2)
Cut the smallest oval of the eyes out of black (x2)
Cut the small circles on the eyes out of white felt (x2)
Cut one nose out of pink felt
Cut the back of the mouth out of pink felt
Cut the tongue out of light pink felt
Cut the teeth out of white felt (x2)

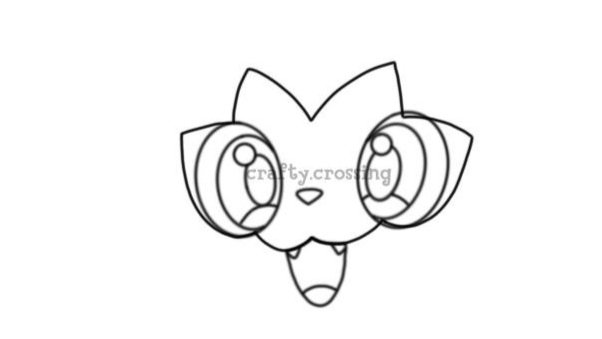
· Glue the large leaf to the head. The top should sit on round 8 of the head & the bottom should sit on round 19 of the head. Place the rest of the pieces according to the guide – leave the smaller leaf alone for now (it will be used later)

· Once the face is assembled, pin the “whiskers” to the sides of the face.
The top should sit between rounds 18&19 of the head & the bottom should sit between rounds 23&24 of the head.
They should sit below the ears.
· Sew the whiskers to the sides of the head.

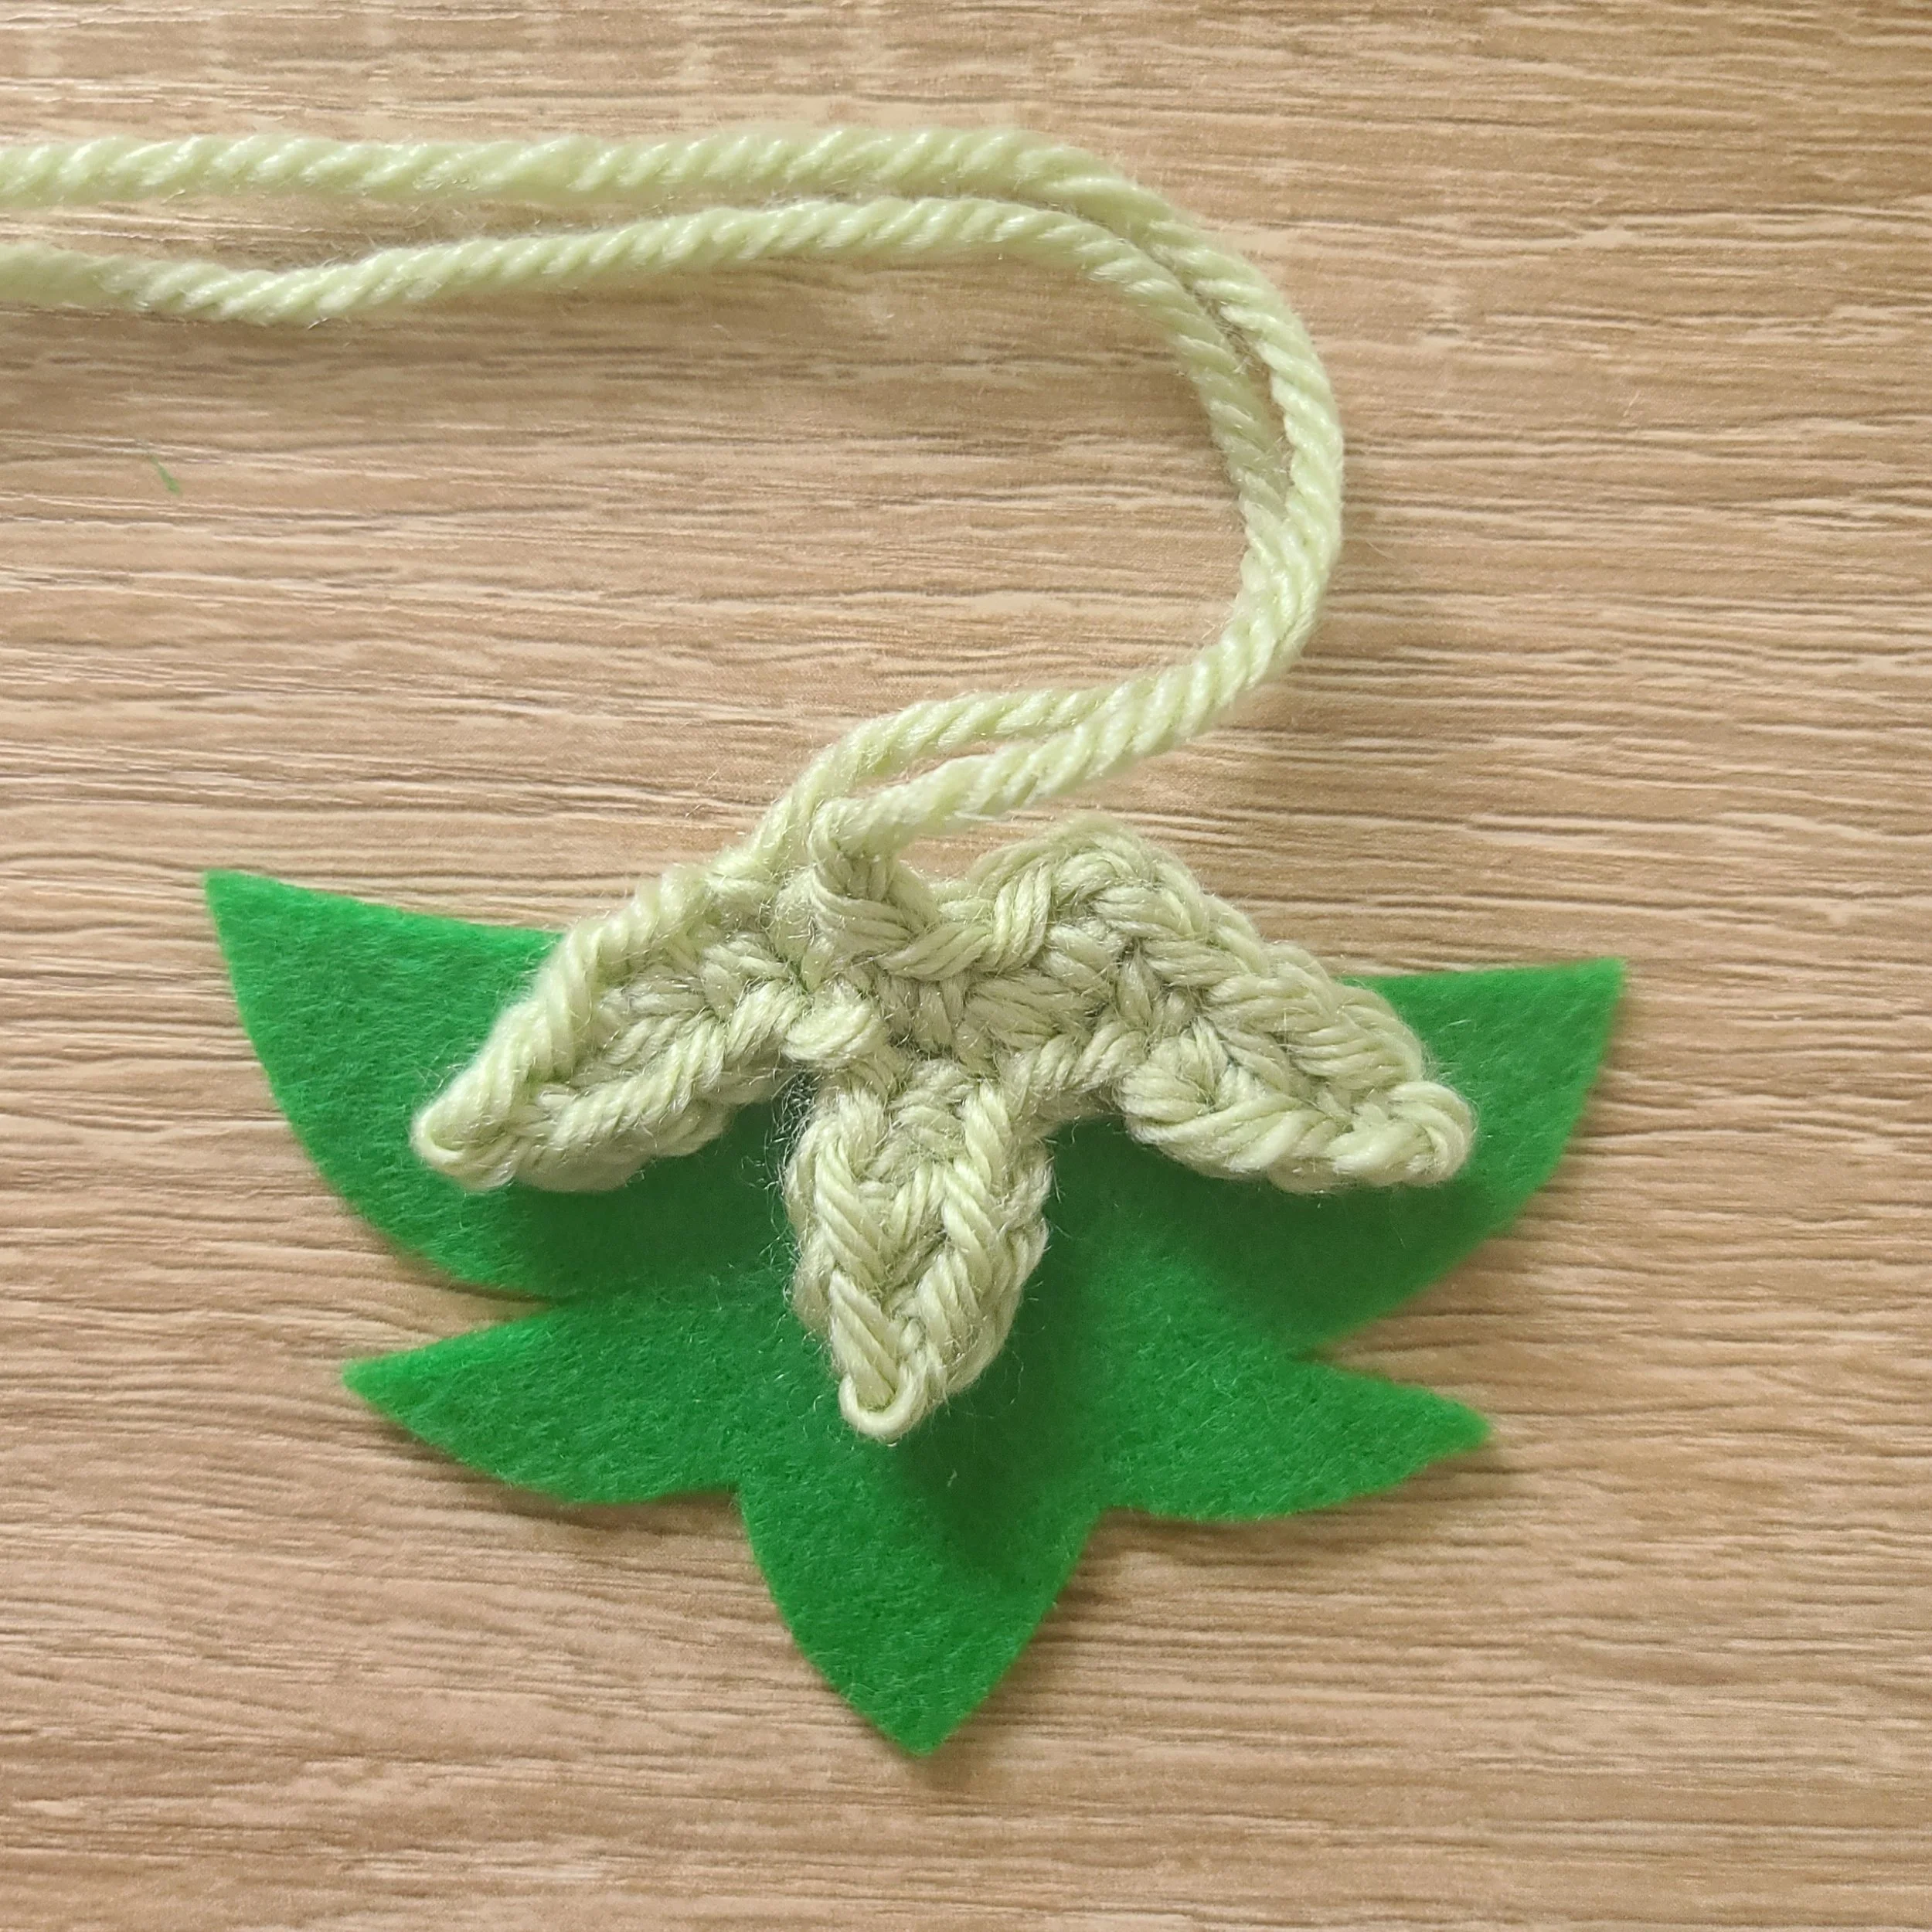
· Using fabric glue, glue the crocheted “front piece” to the smaller “leaf” cut out of felt.
The 3 stitches made along the top of crocheted piece should overhang at the top slightly.
· Sew the front piece to the last round of the body at the front.

· Pin the tail to the back of the body – the bottom should sit between rounds 4&5 of the body & the top should sit between rounds 7&8 of the body. Sew the tail to the body.
· Sew the small tail piece to the tail, between the last 4&5 rounds of the tail.
· Using a small piece of black yarn or embroidery floss, embroider a line above the mouth.


Congrats! You’re finished!! If you’d rather have a printable version of this pattern, you can find it here.