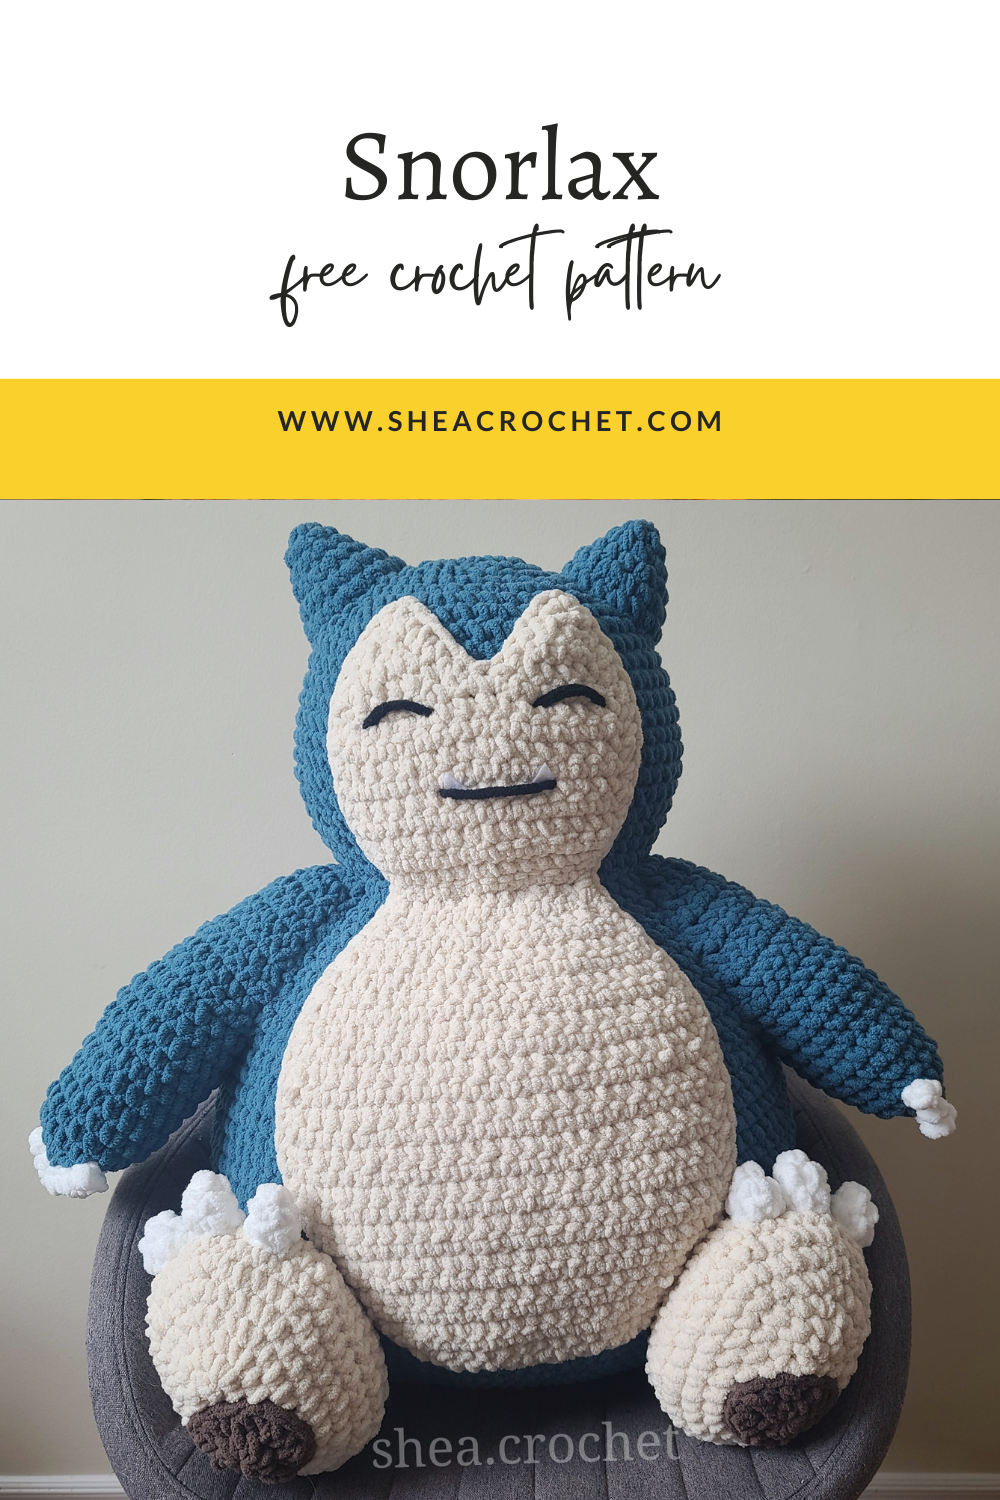
Snorlax crochet pattern
An old friend of mine took a look at my website recently and told me that I’ve gotta bring that “recipe site energy” & ramble on about stories. I rarely type much about myself or my life, sooo this should be fun.
Waaaay back when I was a kid, Pokemon Red&Blue came out. I had one of the see-through purple Gameboys & Pokemon Red. It was by far my favourite game as a kid. I spent hours playing it & trading Pokemon with my younger sister. Probably why now, at 31 years old, I still have the Kanto town map & where to find the legendary Pokemon in it memorized.
One of the million useless things I remember from playing that game was the Snorlax was fairly difficult to catch. After getting the flute, you’ve gotta find him sleeping & blocking the path on certain routes. Like I said, he’s pretty hard to catch, so I’d have to save the game & reset it a bunch of times, trying not to faint him or get knocked out by him. If either of those things happened, he’d disappear & you wouldn’t get another chance to catch him.
There weren’t many in the game, so it was definitely the easiest (& most annoying) way to catch him.
Years later, as an adult, Pokemon Go came out. Snorlax quickly became one of my dog’s favourite Pokemon, because we’d run outside every time he appeared nearby in the game.
My dog’s 8 years old now. He still enjoys running, but I’ve long quit playing Pokemon Go. So instead of running out to find Snorlax with me, he has been enjoying cuddling up to the giant, shiny Snorlax that’s been sitting on my couch for the past few days.
Pretty sure that’s enough rambling, so let’s get to the pattern!
I’m going to write the instructions to make the giant one. I have no idea about the exact amount of yarn or stuffing needed to make a smaller one - but it’s easy enough to resize amigurumi.
If you would rather make a smaller one, just follow the pattern using a worsted weight yarn & smaller crochet hook (3mm/3.5mm/4mm).
Materials & Tools
Yarn: 3 large skeins of Bernat Blanket yarn in “Lagoon” (regular) or “Lapis” (shiny)
One skein of Bernat Blanket yarn in “Birch”
Less than one skein of Bernat Blanket yarn in “Taupe” (foot pads - optional - can sub for brown felt)
A small skein of Bernat Blanket yarn in “White”
Optional: a small amount of Bernat Blanket yarn in “Black” (for the eyes & mouth)
Crochet hook: 7mm or whatever size of hook will make your stitches tight enough that the stuffing isn’t popping through
Stuffing: 5lbs~ of stuffing (he’s big!)
A small amount of white felt for his teeth
Stitch Marker
Sewing needle
Scissors
Fabric glue
Pins (I used T-pins)
Abbreviations
Sc - single crochet
Hdc - half double crochet
inc - increase
dec - decrease
Notes
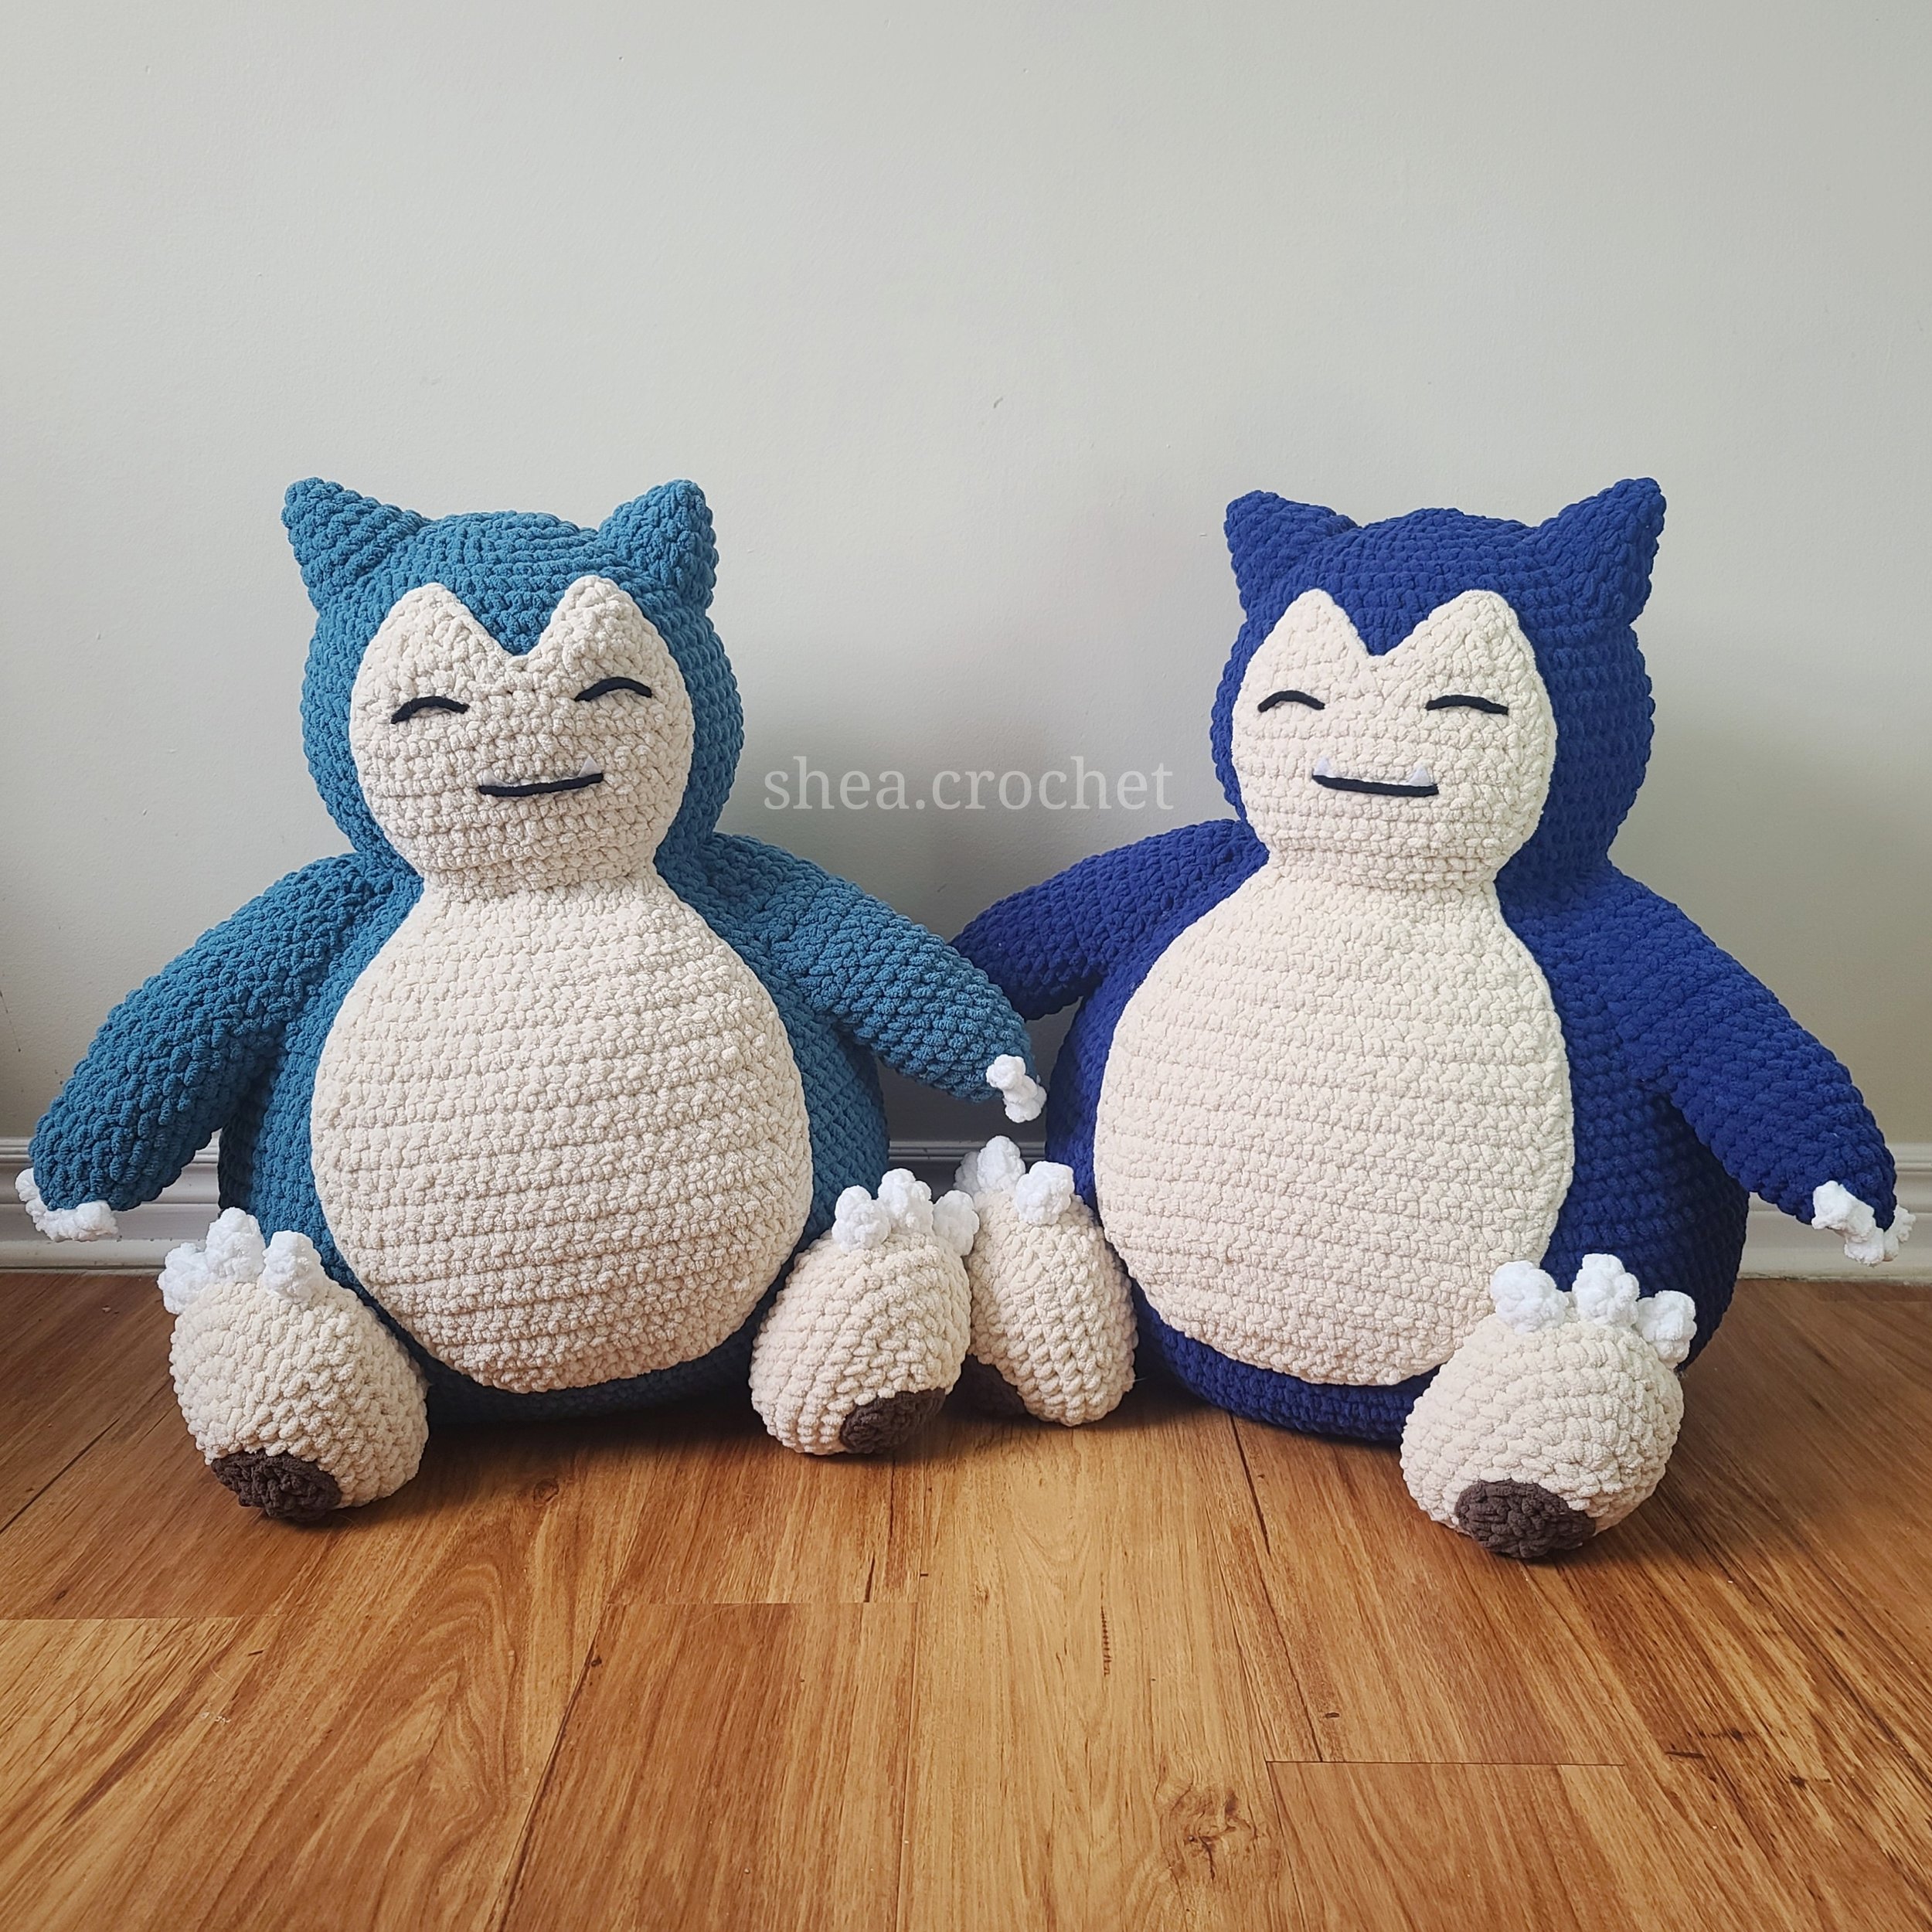
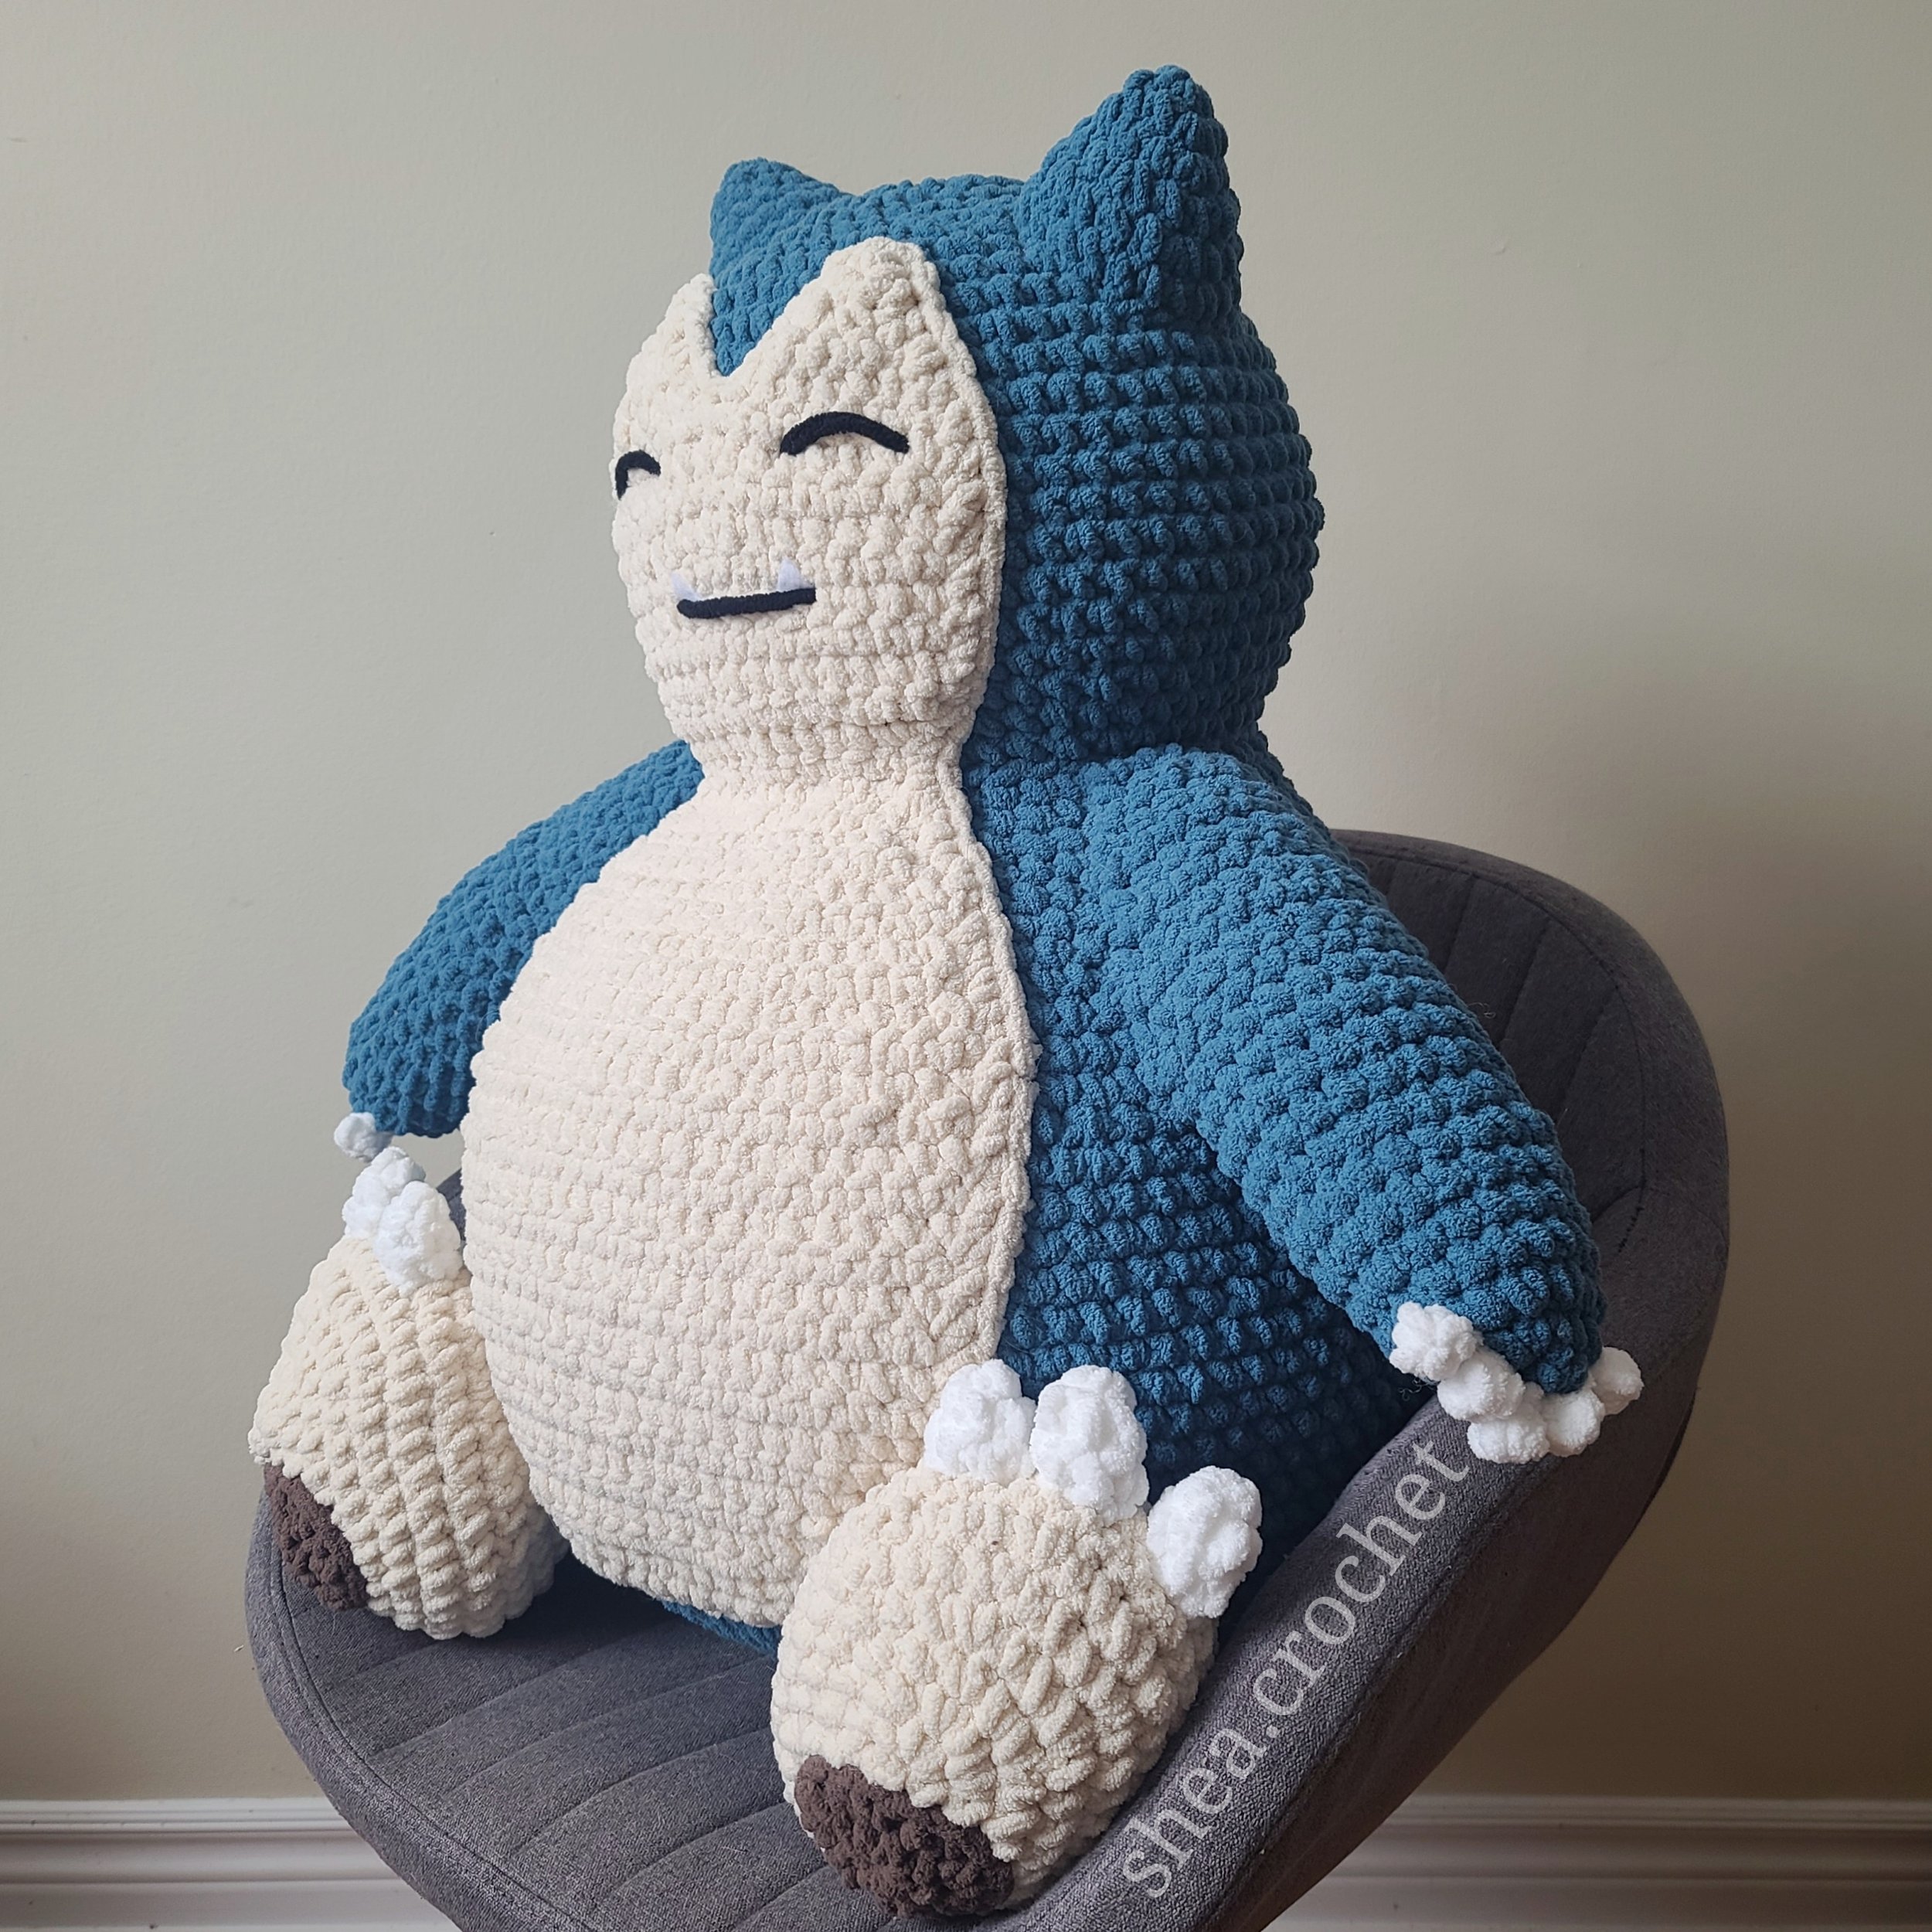
This guy is large. I mean, like, VERY large. Finished size: he’s about 26 inches tall, 18.5 inches~ from feet to back & 28 inches wide (from arm to arm).
Like all amigurumi, gauge doesn’t matter. Just make sure your stitches are tight/consistent.
PLEASE read through the pattern & links to tutorials provided to make sure that you understand how to go make it BEFORE starting it.
This pattern has been checked over THOROUGHLY - there are NO errors in it. Since it is free, I won’t be here to help if you get stuck. All the info is already here, so PLEASE be sure to read through it carefully!
This pattern is NOT suitable for beginners - though it MAY be able to be made by more “advanced” beginners, or those who are well versed at reading patterns.
I didn’t stop to take a million pictures of pieces while making them, but there are some pictures to help at the bottom.
If you get stuck, there’s tutorials all over my website. The oval shape is linked under the parts that use that shape. If you’re super stuck, a tutorial for reading patterns can be found here
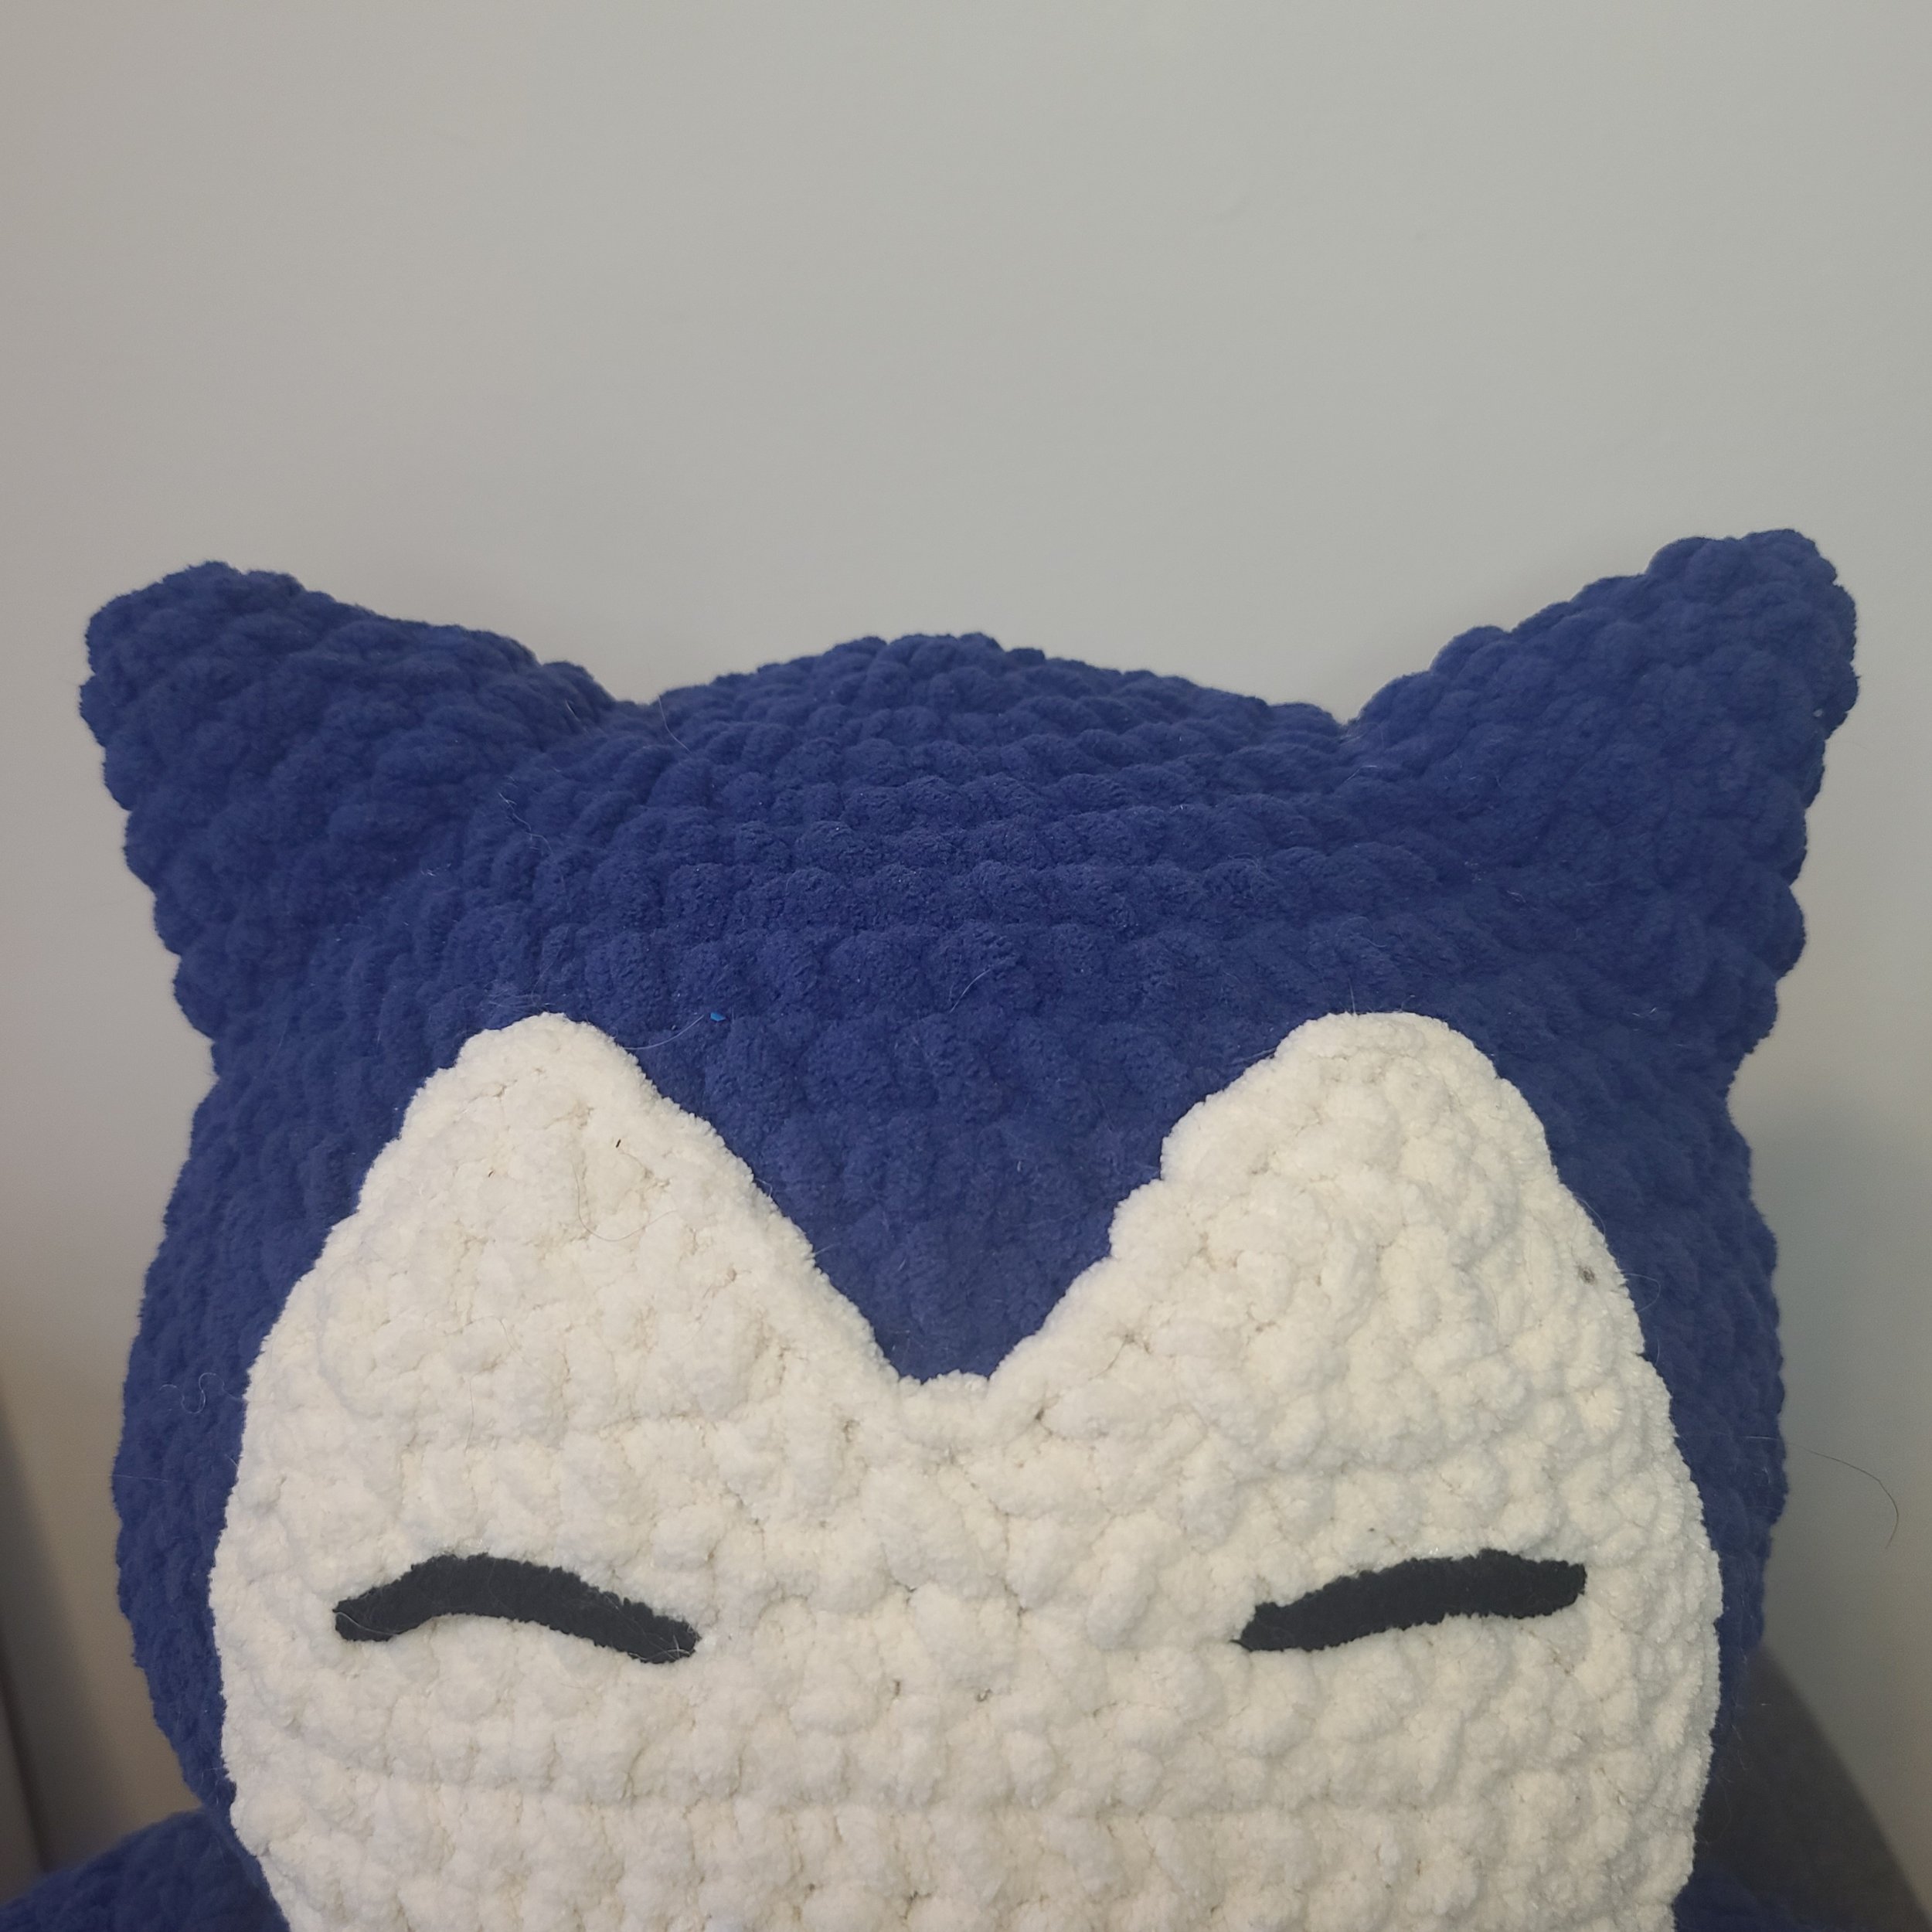
Head
Worked in continuous rounds - do not slip stitch/chain one to join rounds.
Made in “Lagoon” or “Lapis”
1. Make 6 sc in a magic ring (6)
2. Increase in each stitch (12)
3. (sc, inc) x 6 (18)
4. sc, inc, (2 sc, inc) x 5, sc (24)
5. (3 sc, inc) x 6 (30)
6. 2 sc, inc, (4 sc, inc) x 5, 2 sc (36)
7. (5 sc, inc) x 6 (42)
8. 3 sc, inc, (6 sc, inc) x 5, 3 sc (48)
9. (7 sc, inc) x 6 (54)
10. sc in each stitch (54)
11. 4 sc, inc, (8 sc, inc) x 5, 4 sc (60)
12. sc in each stitch (60)
13. (14 sc, inc) x 4 (64)
14-18. sc in each stitch (64)
19. (14 sc, dec) x 4 (60)
20. sc in each stitch (60)
21. 4 sc, dec, (8 sc, dec) x 5, 4 sc (54)
22. sc in each stitch (54)
23. (7 sc, dec) x 6 (54)
Fasten off. Add stuffing to the head. The increases from round 13 should make the head slightly oval-shaped.
Body
Worked in an oval shape - for oval tutorial, click here
Worked in continuous rounds - do not slip stitch/chain one to join
Made in “Lagoon” or “Lapis”
1. Chain 18. Starting in the second chain from the hook: inc, 15 sc, make 3 sc in the last chain. Turn so you are working on the opposite side of the foundation chain. 16 sc. (36)
2. inc, inc, 15 sc, inc, inc, inc, 15 sc, inc (42)
3. sc, inc, sc, inc, 16 sc, inc, sc, inc, sc, inc, 16 sc, inc (48)
4. 2 sc, inc, 2 sc, inc, 17 sc, inc, 2 sc, inc, 2 sc, inc, 17 sc, inc (54)
5. 3 sc, inc, 3 sc, inc, 18 sc, inc, 3 sc, inc, 3 sc, inc, 18 sc, inc (60)
6. 4 sc, inc, 4 sc, inc, 19 sc, inc, 4 sc, inc, 4 sc, inc, 19 sc, inc (66)
7. 5 sc, inc, 5 sc, inc, 20 sc, inc, 5 sc, inc, 5 sc, inc, 20 sc, inc (72)
8. 4 sc, inc, (8 sc, inc) x 7, 4 sc (80)
9. (9 sc, inc) x 8 (88)
10. 5 sc, inc, (10 sc, inc) x 7, 5 sc (96)
11. sc in each stitch (96)
12. (11 sc, inc) x 8 (104)
13. sc in each stitch (104)
14. 6 sc, inc, (12 sc, inc) x 7, 6 sc (112)
15-24. sc in each stitch (112)
25. 6 sc, dec, (12 sc, dec) x 7, 6 sc (104)
26-29. sc in each stitch (104)
30. (11 sc, dec) x 8 (96)
31. sc in each stitch (96)
32. 5 sc, dec, (10 sc, dec) x 7, 5 sc (88)
33. sc in each stitch (88)
34. (9 sc, dec) x 8 (80)
35. 4 sc, dec, (8 sc, dec) x 7, 4 sc (72)
36. sc in each stitch (72)
37. (7 sc, dec) x 8 (64)
38. sc in each stitch (64)
39. 3 sc, dec, (6 sc, dec) x 7, 3 sc (56)
40. sc in each stitch (56)
41. (5 sc, dec) x 8 (48)
Fasten off, leaving a very long tail to sew the body to the head. Add a LOT of stuffing to the body.
Ears
Make two ears
Made in continous rounds - do not slip stitch/chain one to join
Made in “Lagoon” or “Lapis”
1. Make 6 sc in a magic ring (6)
2. (sc, inc) x 3 (9)
3. sc, inc, 2 sc, inc, 2 sc, inc, sc (12)
4. sc, inc, 2 sc, inc, 2 sc, inc, 2 sc, inc, sc (16)
5. (3 sc, inc) x 4 (20)
6. 2 sc, inc, 4 sc, inc, 4 sc, inc, 4 sc, inc, 2 sc (24)
Fasten off, leaving a long tail to sew to the head.
Arms
Make two arms
Made in continuous rounds - do not slip stitch/chain one to join
Made in “Lagoon” or “Lapis”
1. Make 6 sc in a magic ring (6)
2. increase in each stitch (12)
3. inc, inc, 3 sc, inc, inc, inc, 3 sc, inc (18)
4. sc in each stitch (18)
5. 4 sc, inc, 8 sc, inc, 4 sc (20)
6. 9 sc, inc, 9 sc, inc (22)
7-11. sc in each stitch (22)
12. sc in each stitch, then chain one & turn to start working in rows (22)
Working in rows instead of rounds. Make sure you have already chained & turned!:
13. 16 sc, chain one & turn (16)
14. dec, 12 sc, dec, chain one & turn (14)
15. 14 sc, chain one & turn (14)
16. dec, 10 sc, dec, chain one & turn (12)
17. 12 sc, chain one & turn (12)
18. dec, 8 sc, dec, chain one & turn (10)
19. 10 sc, chain one & turn (10)
20. dec, 6 sc, dec, chain one & turn (8)
21. 8 sc, chain one & turn (8)
22. dec, 4 sc, dec, chain one & turn (6)
23. 6 sc (6)
Fasten off, leaving a long tail to sew to the sides of the body. Add stuffing to the bottom of the arm (the part that’s in rows will be stuffed when the arm is sewed to the body).
Feet
Make two feet
Worked in an oval shape, tutorial can be found here
Worked in continuous rounds - do not slip stitch/chain one to join
Made in “Birch”
1. Chain 6. Starting in the second chain from the hook: inc, 3 sc, make 3 sc in the last chain. Turn so you are working on the opposite side of the foundation chain. 4 sc. (12)
2. inc, inc, 3 sc, inc, inc, inc, 3 sc, inc (18)
3. sc, inc, sc, inc, 4 sc, inc, sc, inc, sc, inc, 4 sc, inc (24)
4. 2 sc, inc, 2 sc, inc, 5 sc, inc, 2 sc, inc, 2 sc, inc, 5 sc, inc (30)
5. 3 sc, inc, 3 sc, inc, 6 sc, inc, 3 sc, inc, 3 sc, inc, 6 sc, inc (36)
6. 3 sc, inc, 4 sc, inc, 7 sc, inc, 4 sc, inc, 4 sc, inc, 7 sc, inc, sc (42) - please note the beginning of this round does NOT have an error in it. My rounds shifted a bit (the first increase wasn’t centered with the chain) - it should be “4 sc, inc, 4 sc, inc” BUT instead, one of the first four single crochet stitches is at the end of the round. Ezpz.
7-8. sc in each stitch (42)
9. 4 sc, dec, 4 sc, dec, 7 sc, dec, 4 sc, dec, 4 sc, dec, 7 sc, dec (36) again, rounds shifted a bit, so instead of doing the 3 sc and then having the fourth sc at the END of the round, just do 4 sc at the beginning. Feel free to ignore these explanations & just follow the pattern - they’re only written for the folks who are nit-picky about patterns ;)
10. 3 sc, dec, 3 sc, dec, 6 sc, dec, 3 sc, dec, 3 sc, dec, 6 sc, dec (30)
11. 2 sc, dec, 2 sc, dec, 5 sc, dec, 2 sc, dec, 2 sc, dec, 5 sc, dec (24)
12. 2 sc, dec, 4 sc, dec, 4 sc, dec, 4 sc, dec, 2 sc (20)
Fasten off, leaving a long tail to sew each of the feet to the body. Add stuffing to the feet.
Foot pads
Make two foot pads
Worked in joined rounds - slip stitch & chain one at the end of each round
Made in “Taupe”
1. Make 8 hdc in a magic ring, slip stitch to the first stitch & chain one (8)
2. Make a half double crochet increase in the same stitch as the slip stitch. Half double crochet increase in each of the next 7 stitches. Slip stitch to the first stitch (16)
Fasten off, leaving a tail to sew to the foot.
Belly Patch
Worked in rows
Made in “Birch”
1. Chain 13. Starting in the second chain from the hook: inc, 10 sc, inc, chain one & turn (14)
2. inc, 12 sc, inc, chain one & turn (16)
3. inc, 14 sc, inc, chain one & turn (18)
4. inc, 16 sc, inc, chain one & turn (20)
5. inc, 18 sc, inc, chain one & turn (22)
6. inc, 20 sc, inc, chain one & turn (24)
7-18. 24 sc, chain one & turn (24)
19. dec, 20 sc, dec, chain one & turn (22)
20. 22 sc, chain one & turn (22)
21. dec, 18 sc, dec, chain one & turn (20)
22. 20 sc, chain one & turn (20)
23. dec, 16 sc, dec, chain one & turn (18)
24. dec, 14 sc, dec, chain one & turn (16)
25. 16 sc, chain one & turn (16)
26. dec, 12 sc, dec, chain one & turn (14)
27. dec, 10 sc, dec, chain one & turn (12)
28. 12 sc, chain one & turn (12)
29. inc, 10 sc, inc, chain one & turn (14)
30. inc, 12 sc, inc, chain one & turn (16)
31-37. 16 sc, chain one & turn (16)
38. dec, 4 sc, dec. Place marker in the next stitch (the ninth stitch from row 37). Chain one & turn (6)
39. 6 sc, chain one & turn (6)
40. dec, 2 sc, dec, chain one & turn (4)
41. dec, dec, chain one & turn (2)
42. dec (1)
Fasten off.
Attach yarn in the stitch that was marked in row 37, when making row 38 & continue:
43. dec, 4 sc, dec, chain one & turn 6 (6)
44. 6 sc, chain one & turn (6)
45. dec, 2 sc, dec, chain one & turn (4)
46. dec, dec, chain one & turn (2)
47. dec (1)
Fasten off.
Flip the belly patch over so that the right side of the piece is facing. Attach a new piece of yarn to the bottom left corner & sc a border around. Make 3 sc in row 42. Make 4 sc down the sides of the rows of the top piece. Dec over the next two stitches. Make 4 sc up the other side of the rows (on the second top piece) & make 3 sc in row 47. Then continue on down the other side of the piece.
Make sure that you have an even number of stitches on both of the long sides of the piece.
When finished crocheting the border, fasten off & leave a very long tail to sew the belly patch to the body.
Claws (hands)
Make 10 claws (yeah, it’s a pain)
Made in “White”
1. Make a magic ring with 3 sc. Slip stitch to the first stitch (3)
Fasten off, leaving a tail to sew to the hands.
IF you are finding it difficult to make a magic ring with 3 sc:
1. Chain 2. Make 3 sc in the second chain from the hook. Slip stitch to the first stitch (3)
Fasten off, leaving a tail to sew to the hands.
Claws (feet)
Make 6 claws
Worked in continuous rounds - do not slip stitch/chain one to join
Made in “White”
You can start the claws the alternative way that the hand claws are made.
1. Make a magic ring with 3 sc (3)
2. inc, inc, inc (6)
3. sc in each stitch (6)
Fasten off, leaving a tail to sew the claws to the feet.
Assembly
Stuff the body & head firmly. It’ll take a LOT of stuffing, but that’s okay. He’ll be nice & cuddly.
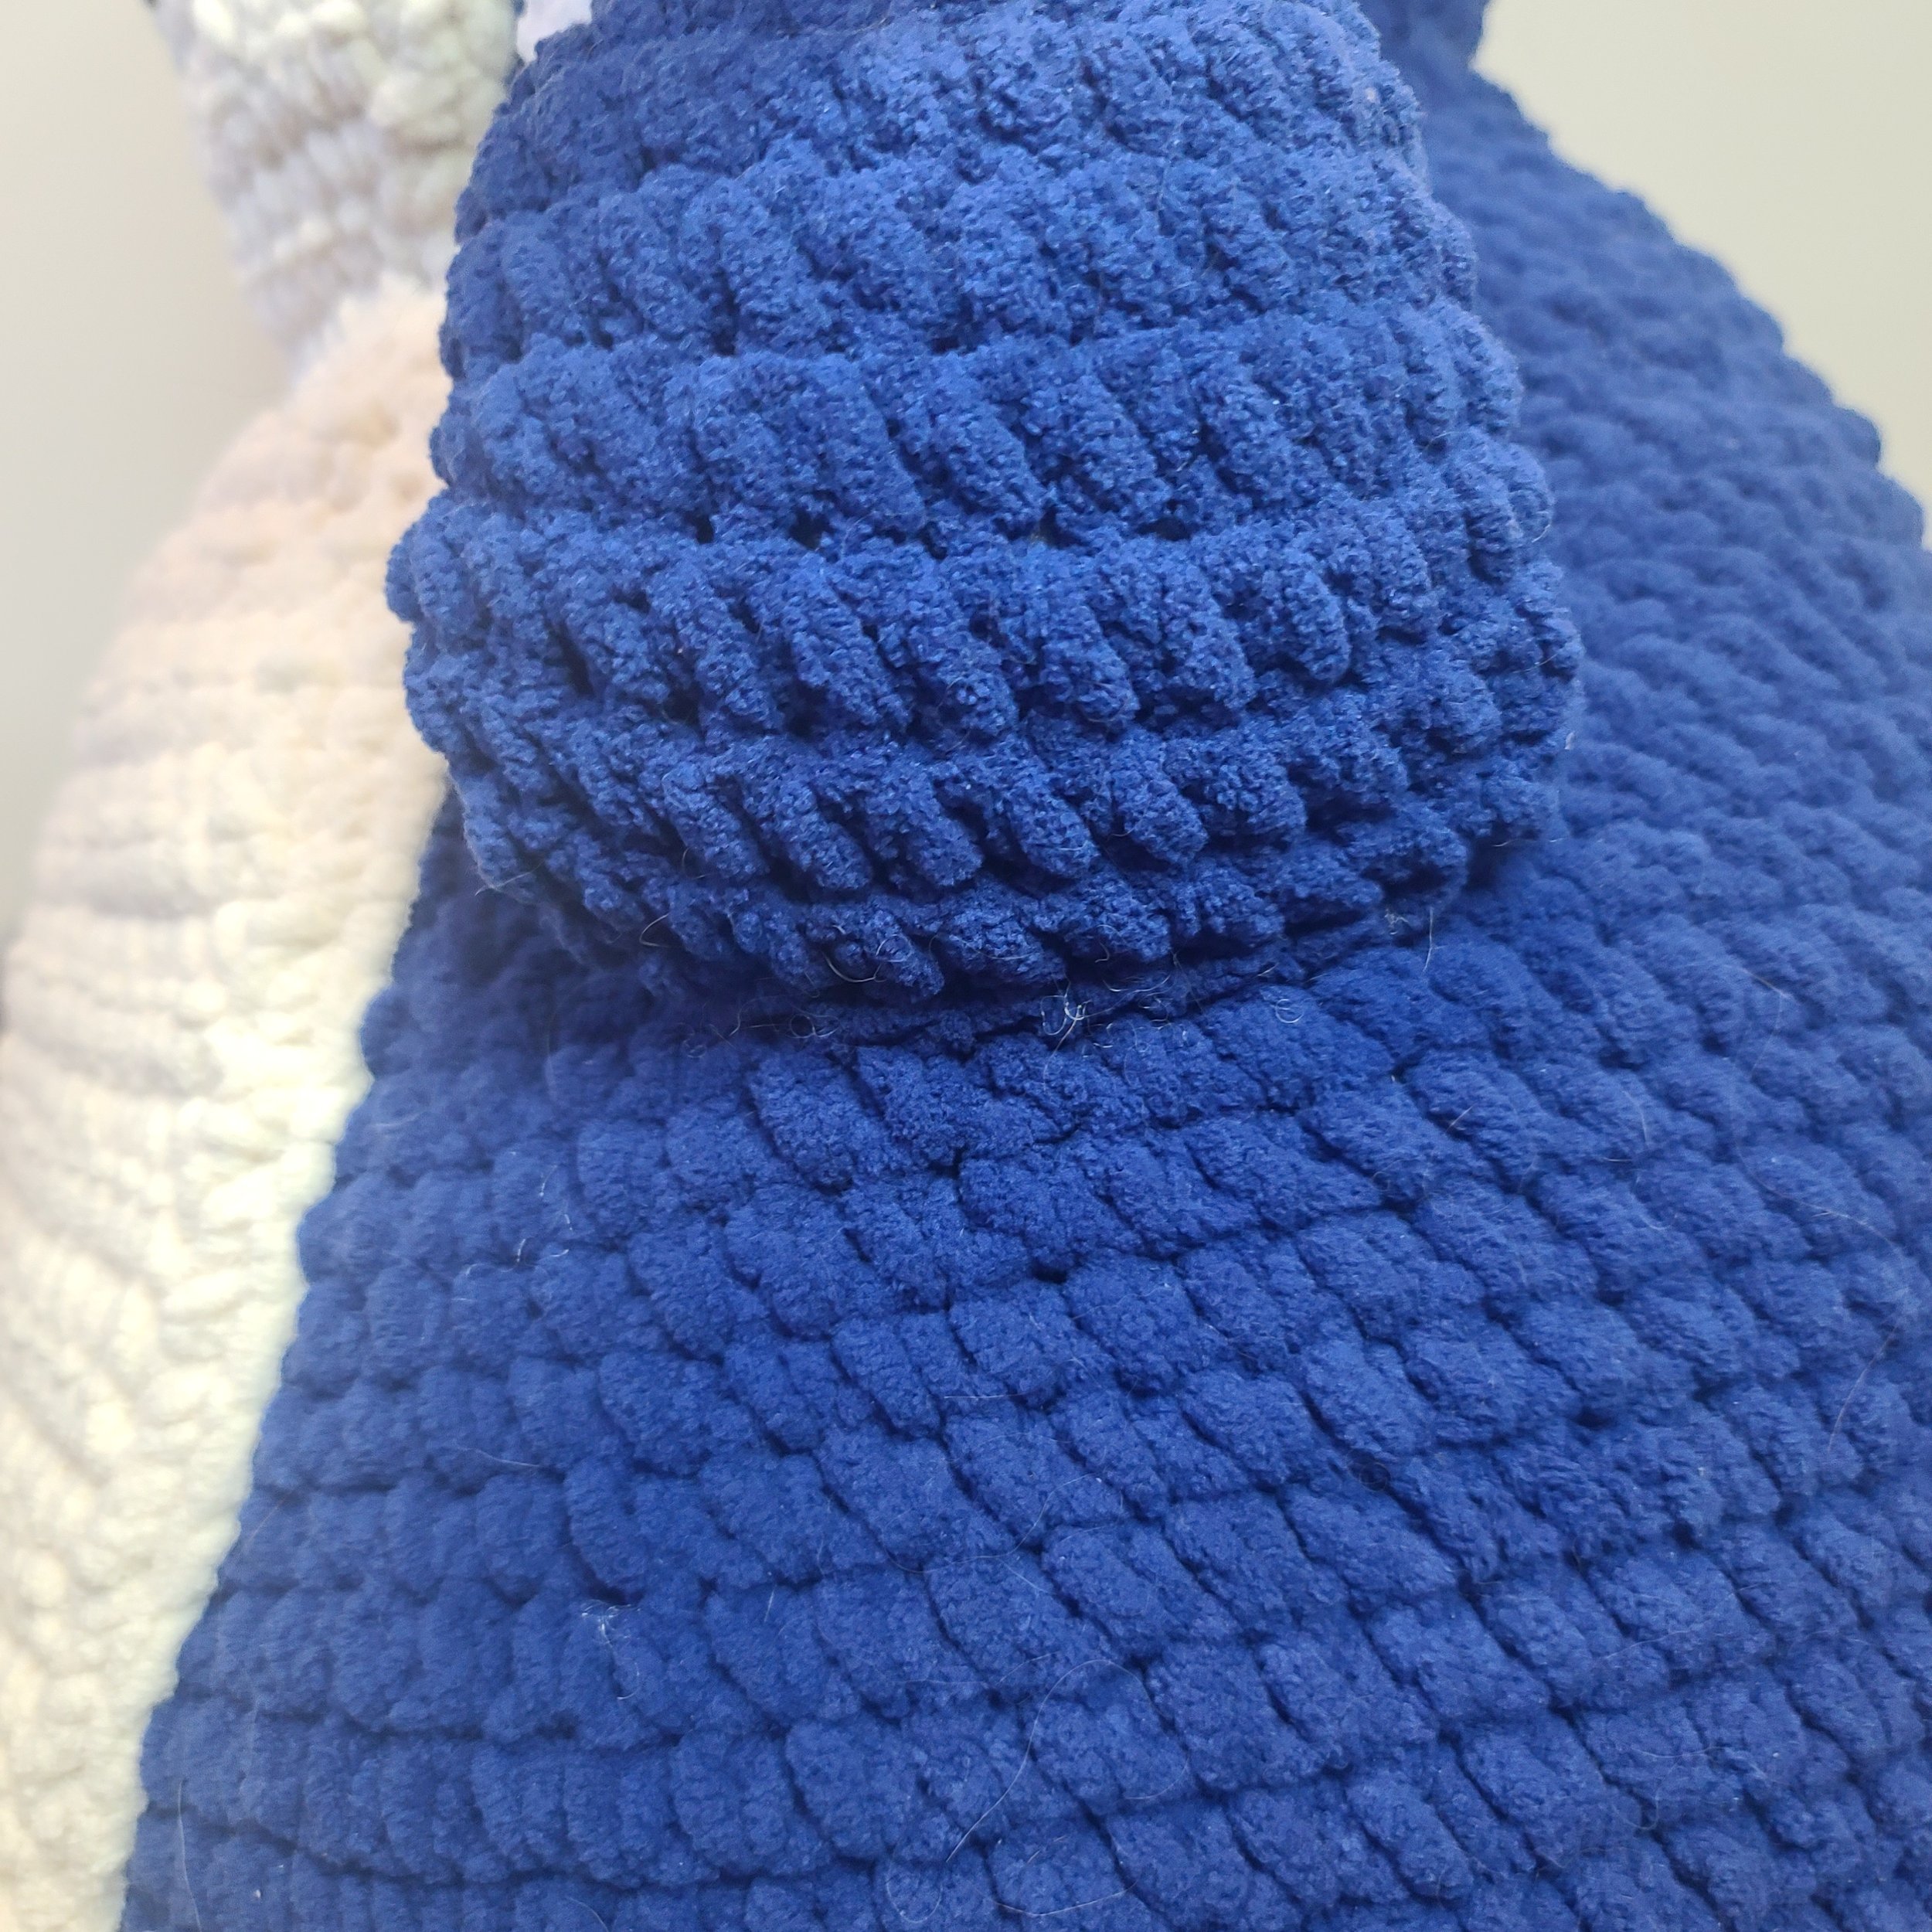
Using the tail left over on the body, sew the body to the head. Sew through the tops of the stitches on the body and around the POSTS of the stitches from the last round of the head. The head should be slightly oval shaped (the increases from round 13 of the head should be on the sides) & the body is definitely oval shaped - so be mindful of that when sewing the two pieces together.
Next is the absolute worst part of this: pin the belly patch to the body. The bottom of the patch should sit between rounds 15&16 of the body.
The top of the belly patch should sit between rounds 8&9 of the head.
I had to use T-pins to pin mine (because the regular pins were way too small). I just stretched the piece out a bit, lined up the bottom & pinned it in place. Then I counted 5-6 stitches up each of the sides, lined it up with the body & placed T-pins. Some of them ended up falling out when I sewed it.
Rows 27 & 28 of the belly patch are the neck, the rows after that are all sewed to the head.
Work around the posts of the stitches on the border when sewing - it will give you a waaaay neater look than whip stitching it on. Just take your time - it sucks, but it’ll be okay :) The picture below is from a snorlax I made a couple years ago - he was much smaller, but should give you an idea of what it should look like.

Now that the painful part is over - onto the rest!
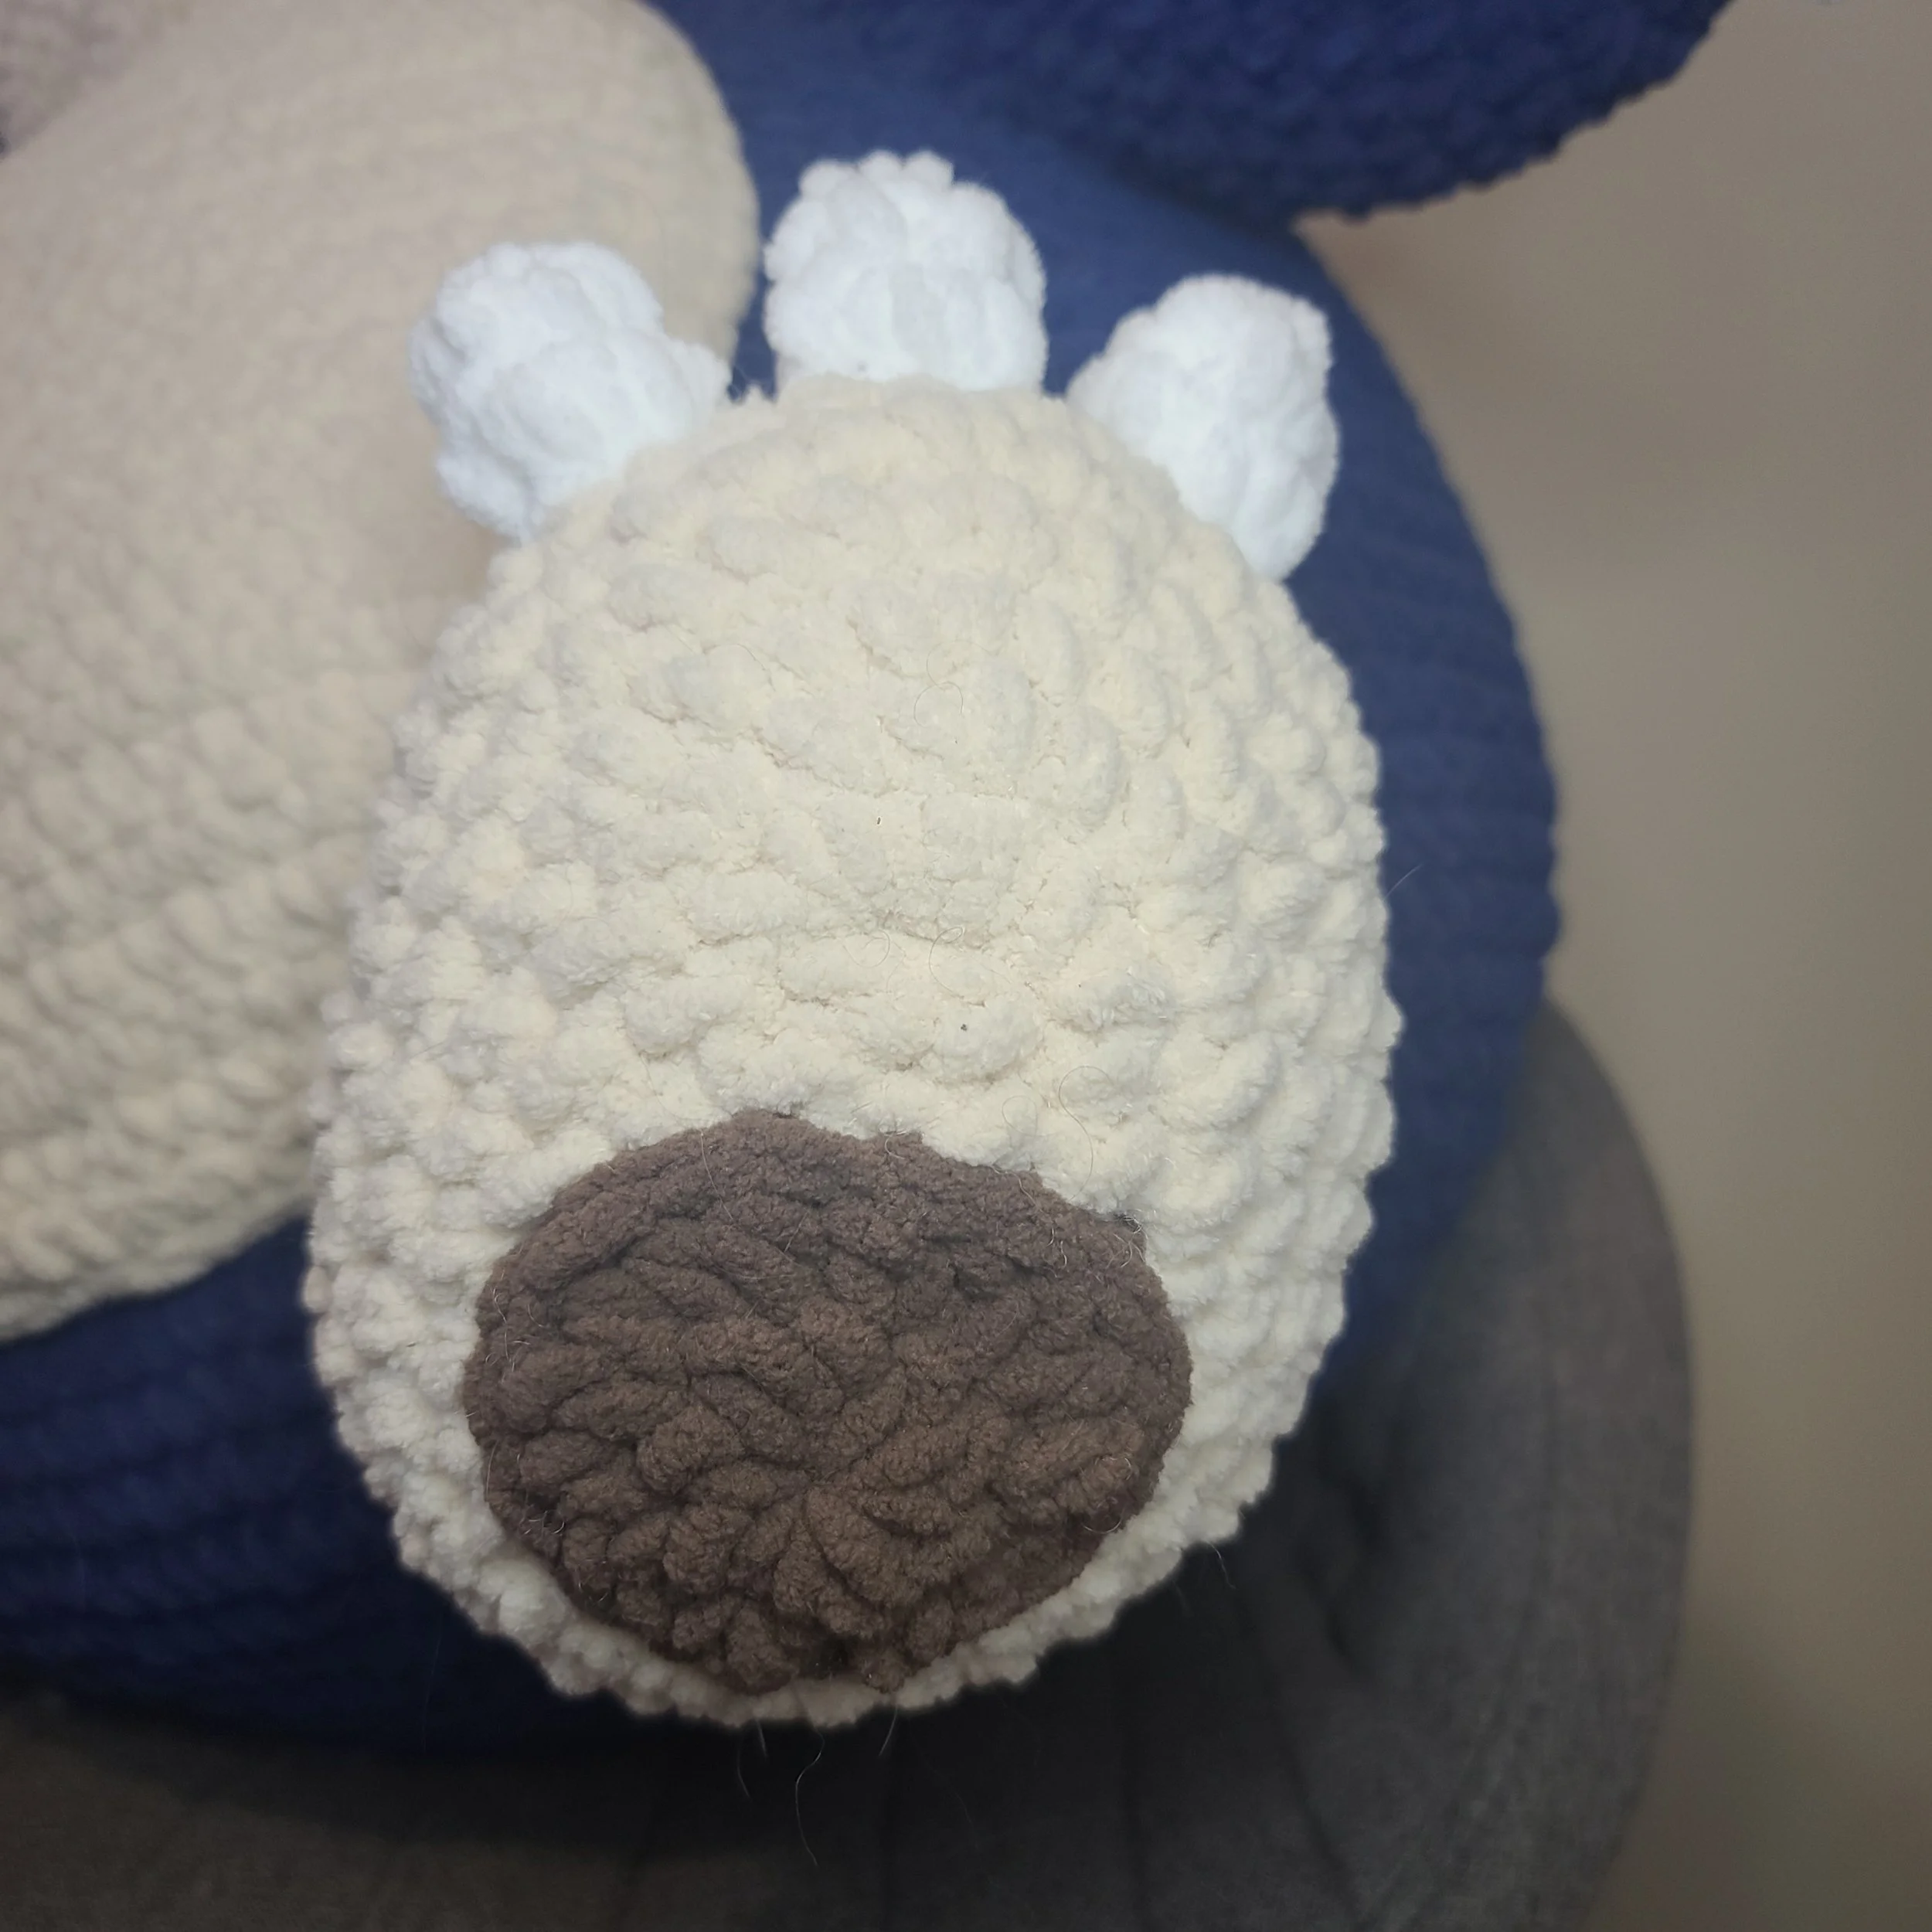
Pin the ears to the head. They should sit between rounds 5&6, to between rounds 11&12 of the head.
Before the ears are fully sewed on, add stuffing to them.
Since my dog’s been using this as his cuddle buddy, there’s a bunch of fur on the pictures below. That’s alright though, he’s happy & I’m happy that he’s enjoying it.
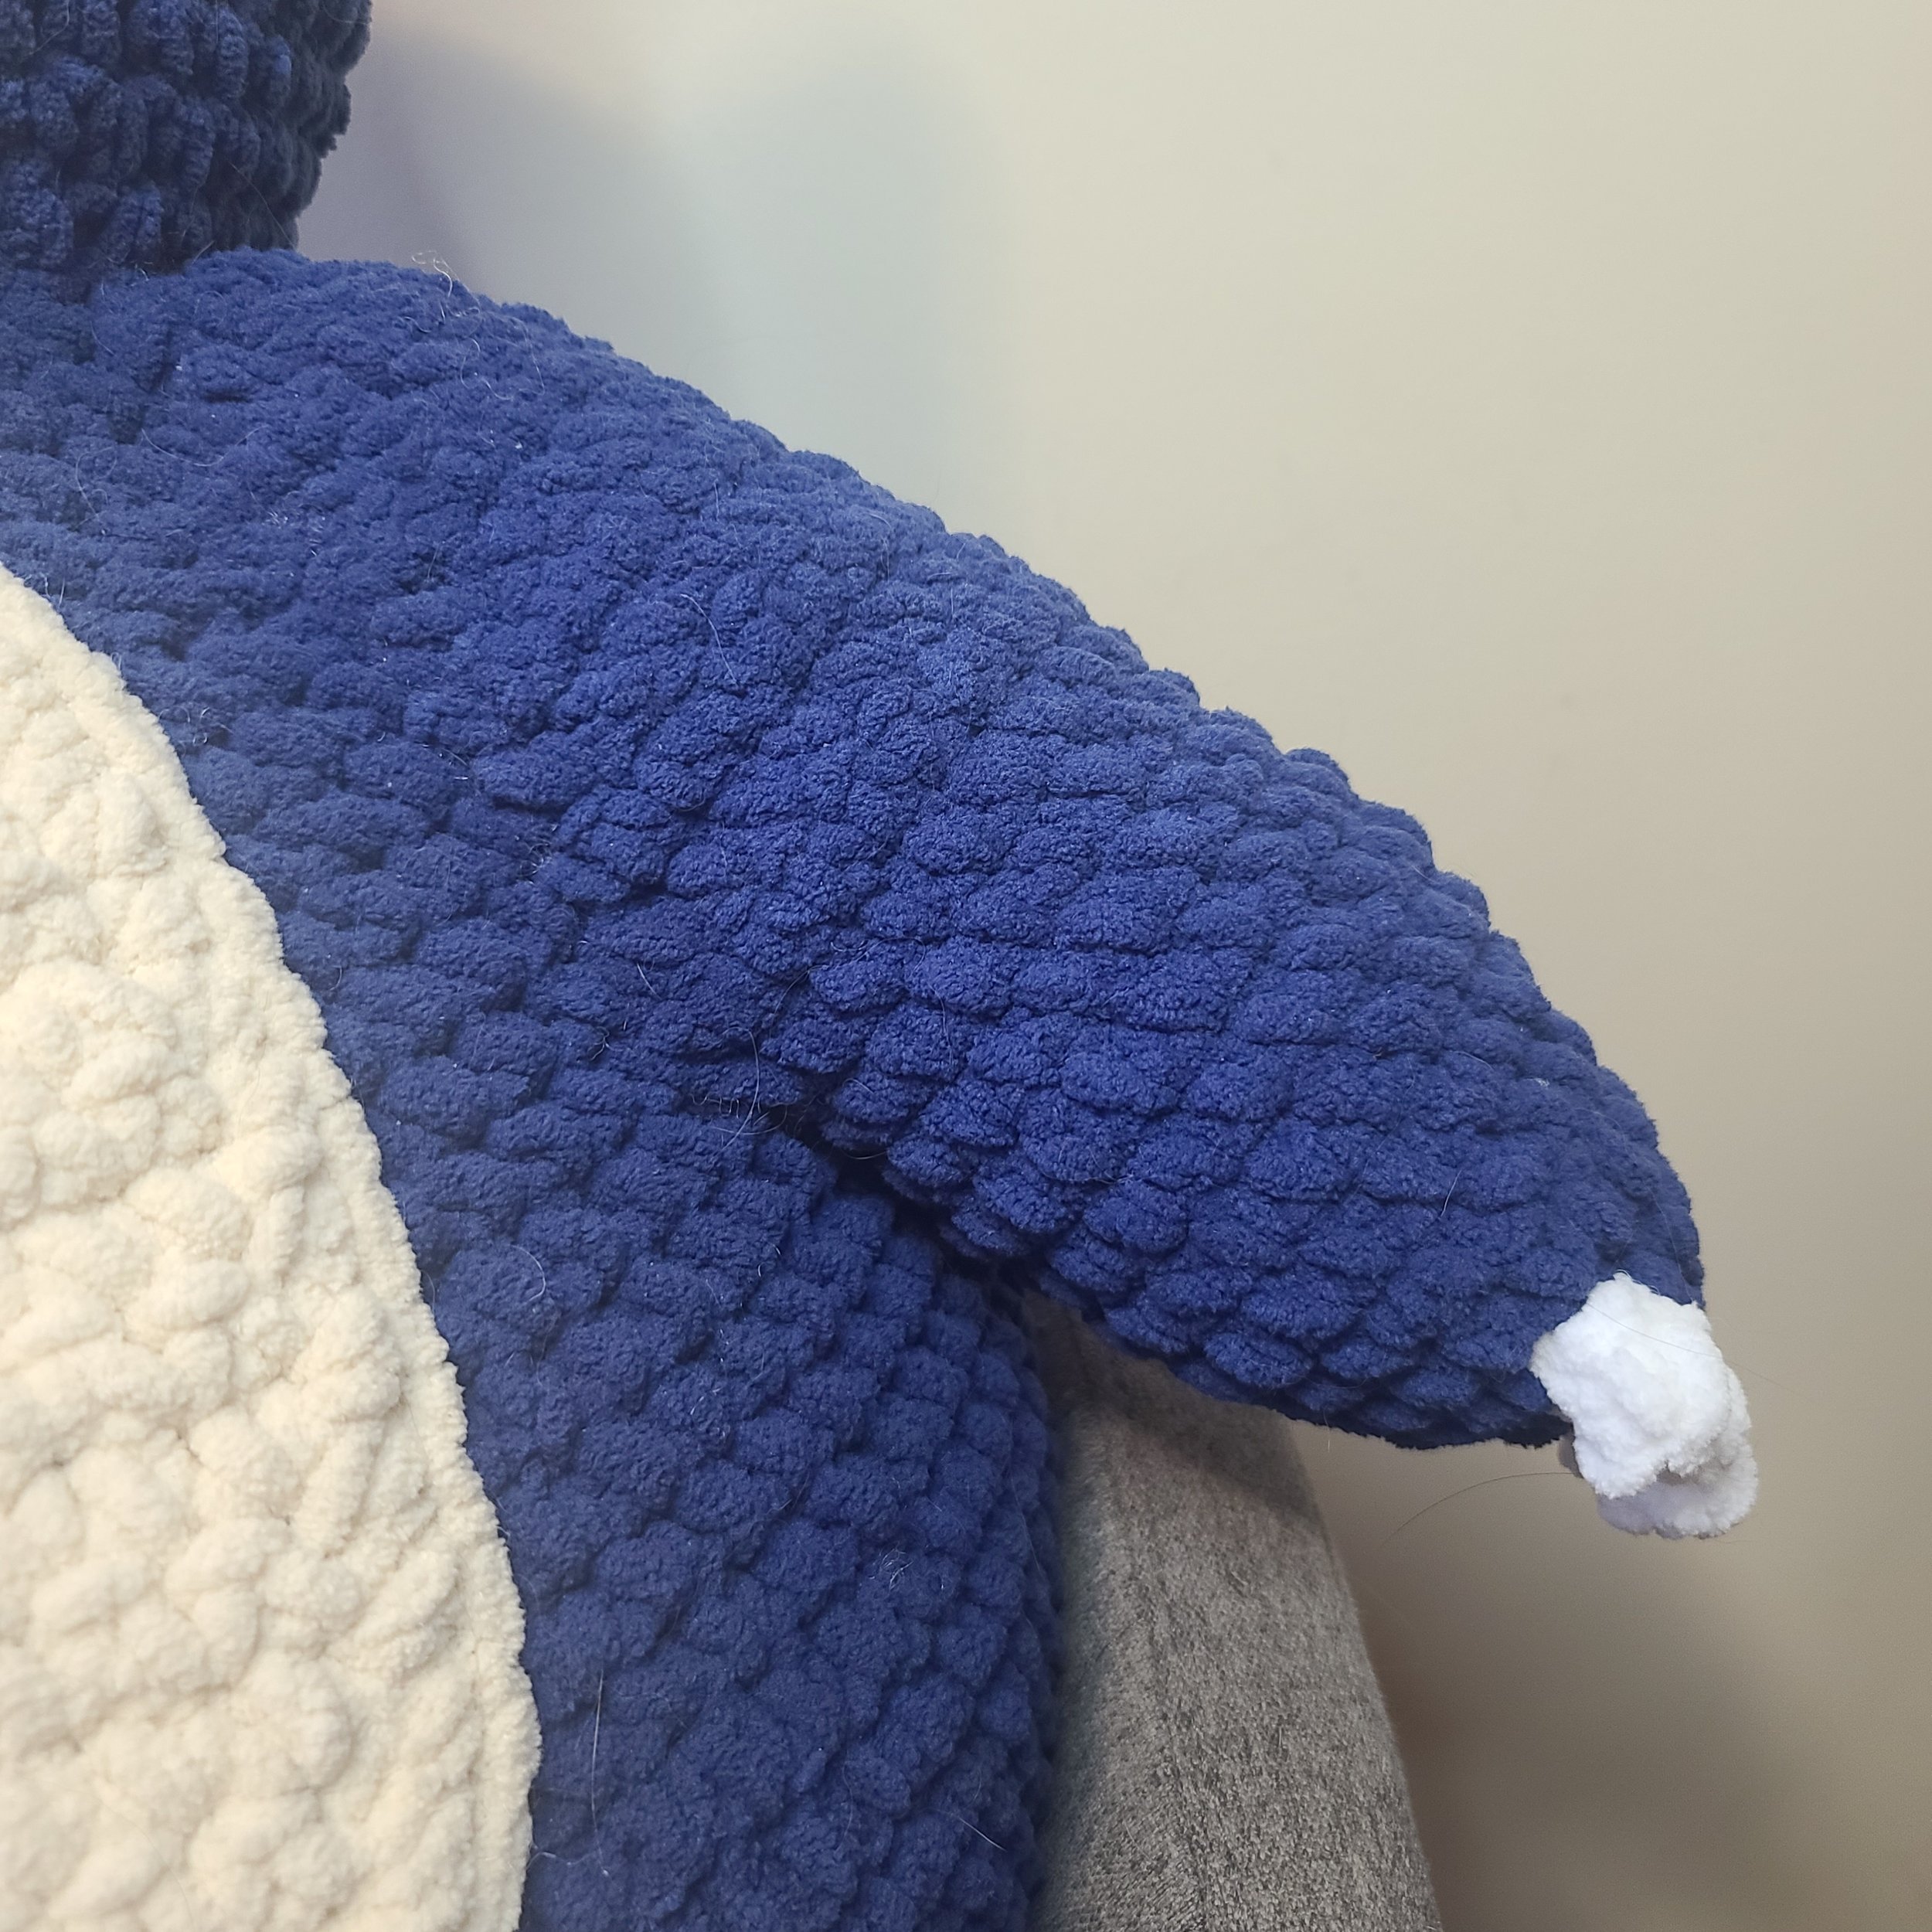
Next up, pin the arms to the sides of the body.
You’ll notice on the arms that there are 6 stitches at the top of the arms (where they’ve been fasted off) AND 6 stitches at the bottoms of the arms (left over from when the arm switched from working in rounds to working in rows).
These two sets of 6 stitches need to be lined up - so the top six stitches will be pinned to the last round of the body (near the head), & the bottom six stitches will be pinned between rounds 28&29 of the body.
Start sewing the arms on - the sides of the rows on the arms should be sewed kind of in a straight line down the side of the body.
When you’re close to finished sewing each of the arms on, add stuffing so that the row part of the arm isn’t flat. It should kind of blend in with the bottom part of the arm/hand. Below is a picture of the side of the arm/view from the front of the snorlax.
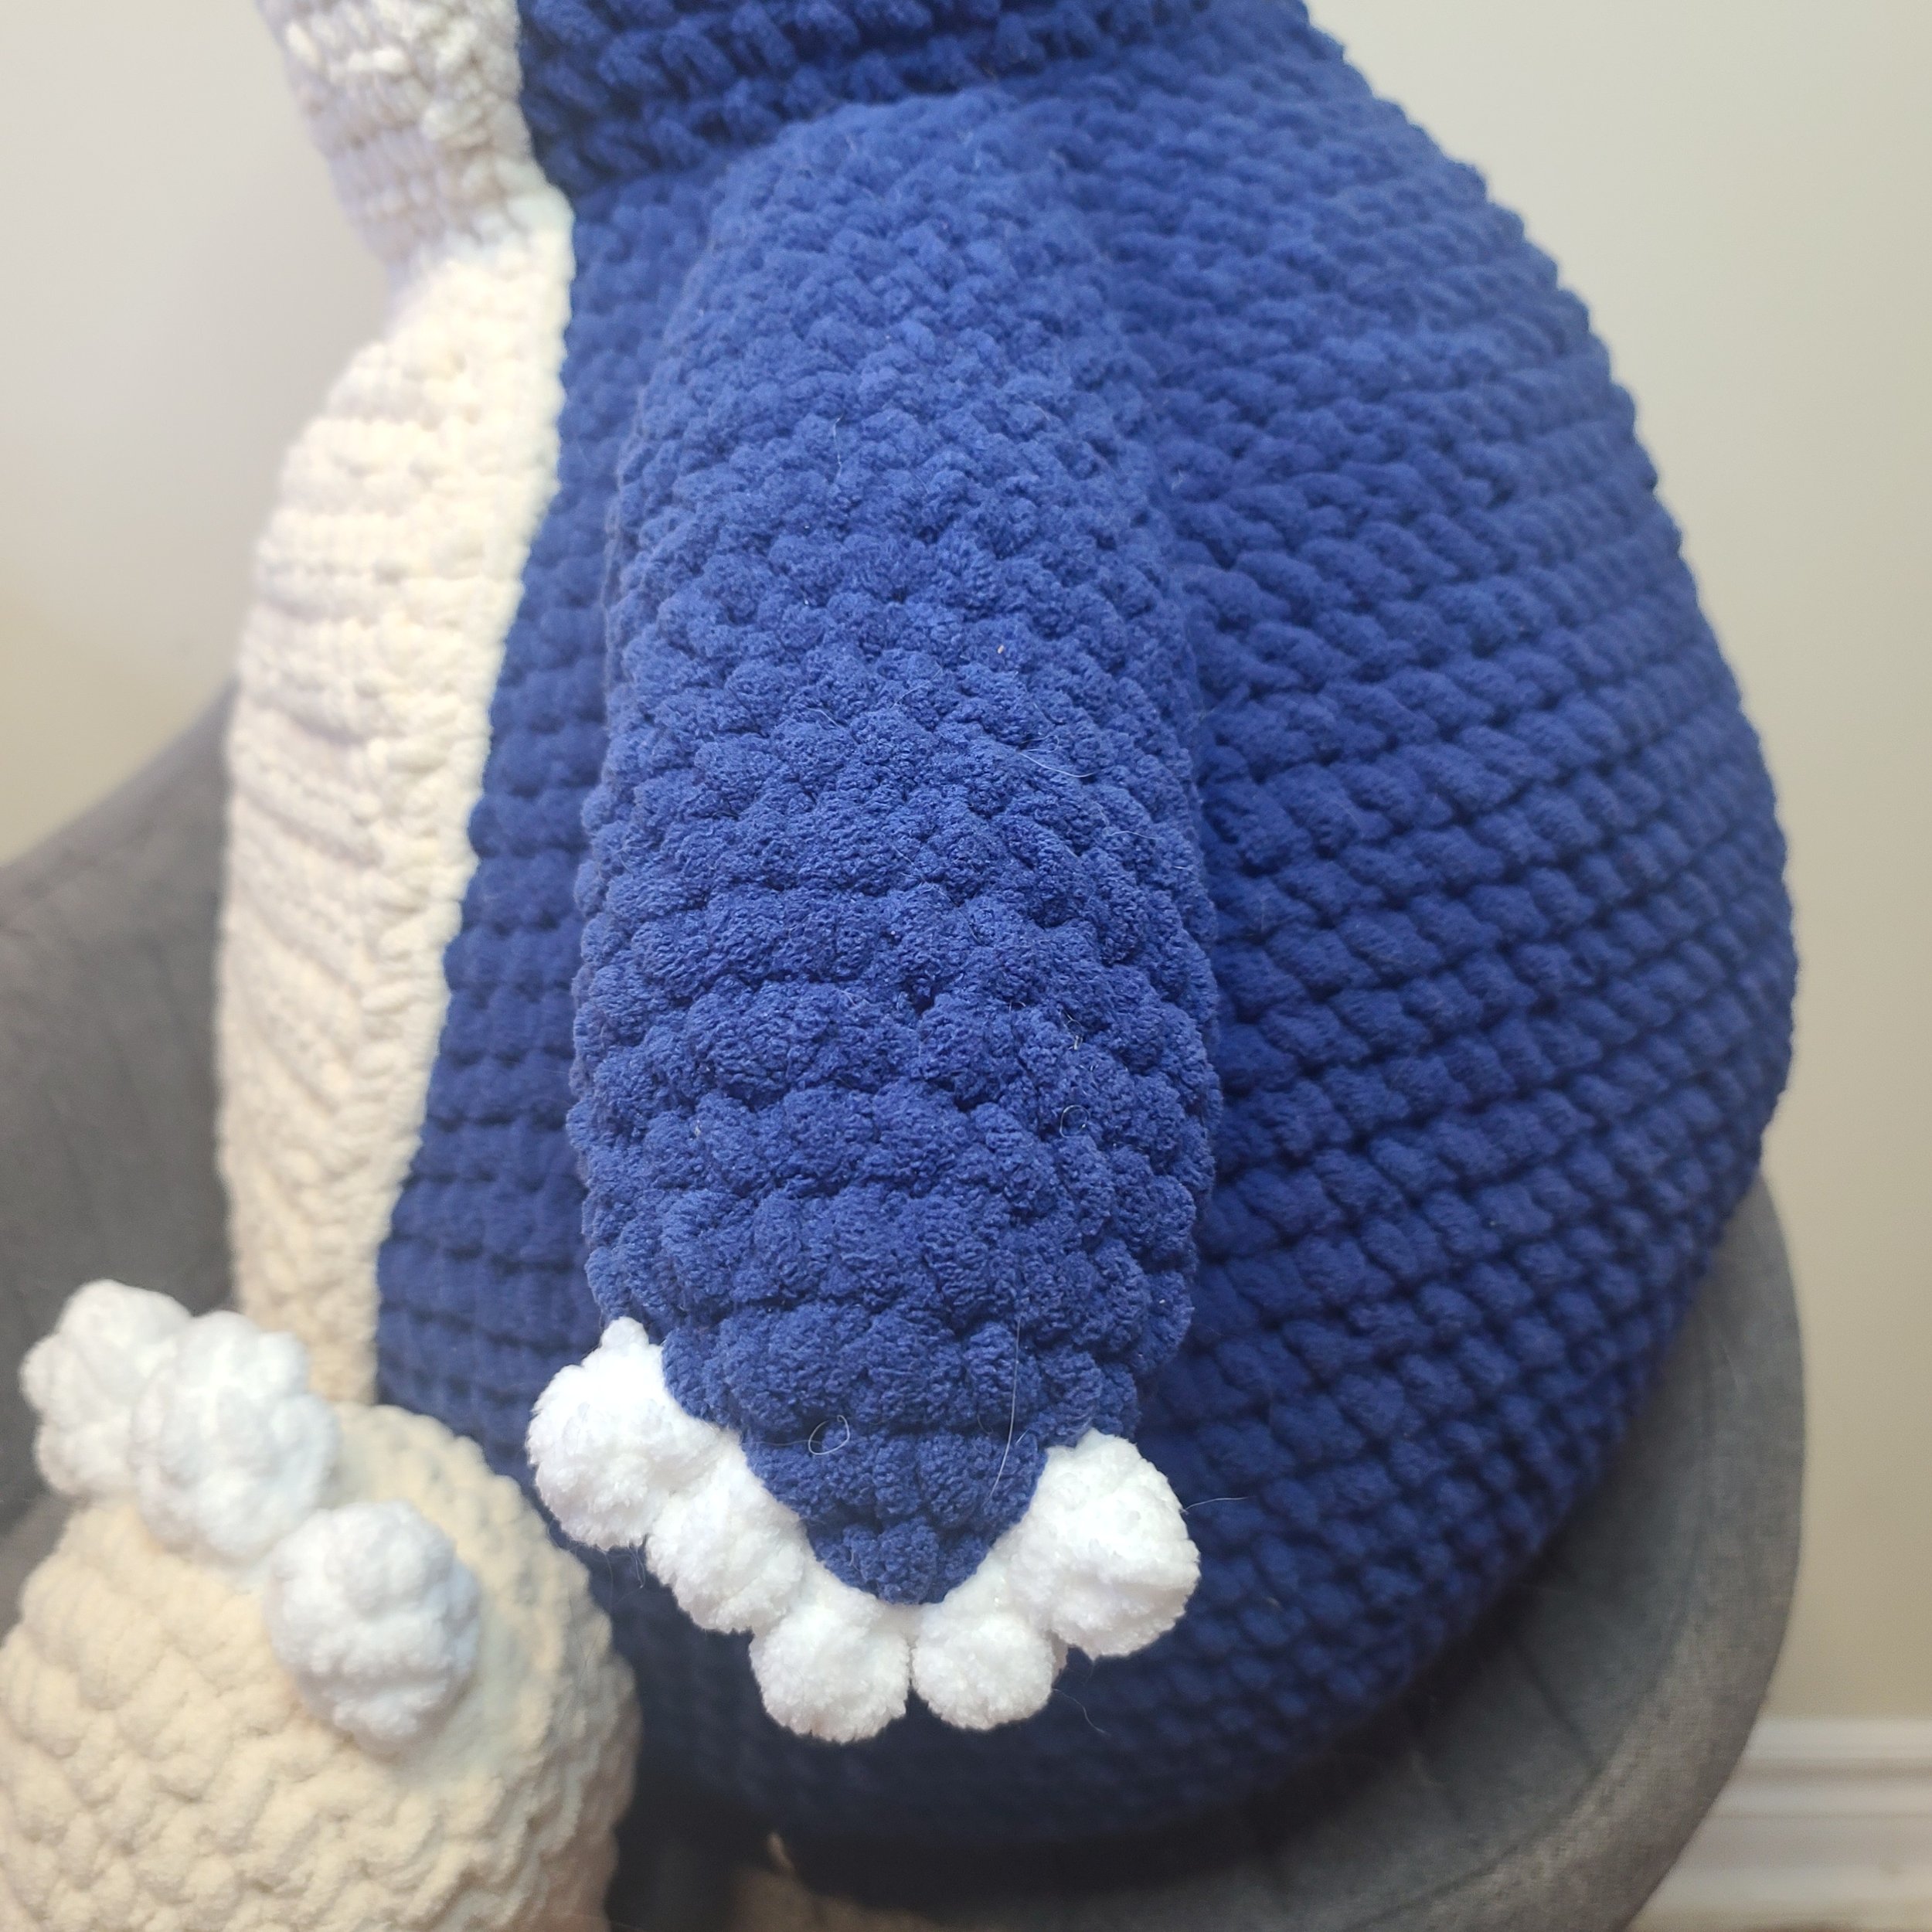
Pin 5 claws to each of the hands & sew them to the hands. They don’t need stuffing - they’re way too small for it. See the pictures above. They should end up fairly close to one another.
Sew a foot pad to each of the feet. They should sit between rounds 3&4 of the feet. Again, sewing around the posts of the stitches on the foot pad. None of those messy looking whip stitches.
Sew the feet to the body - they should be angled kind of outwards. The bottoms of the feet should sit between rounds 12&13 of the body. The tops of the feet should sit between rounds 19&20 of the body.
Next up, sew 3 of each of the foot claws to the feet. You can add a little bit of stuffing to them if you want, it’s really up to you. They should sit between rounds 7&8 to between rounds 8&9 of the feet.
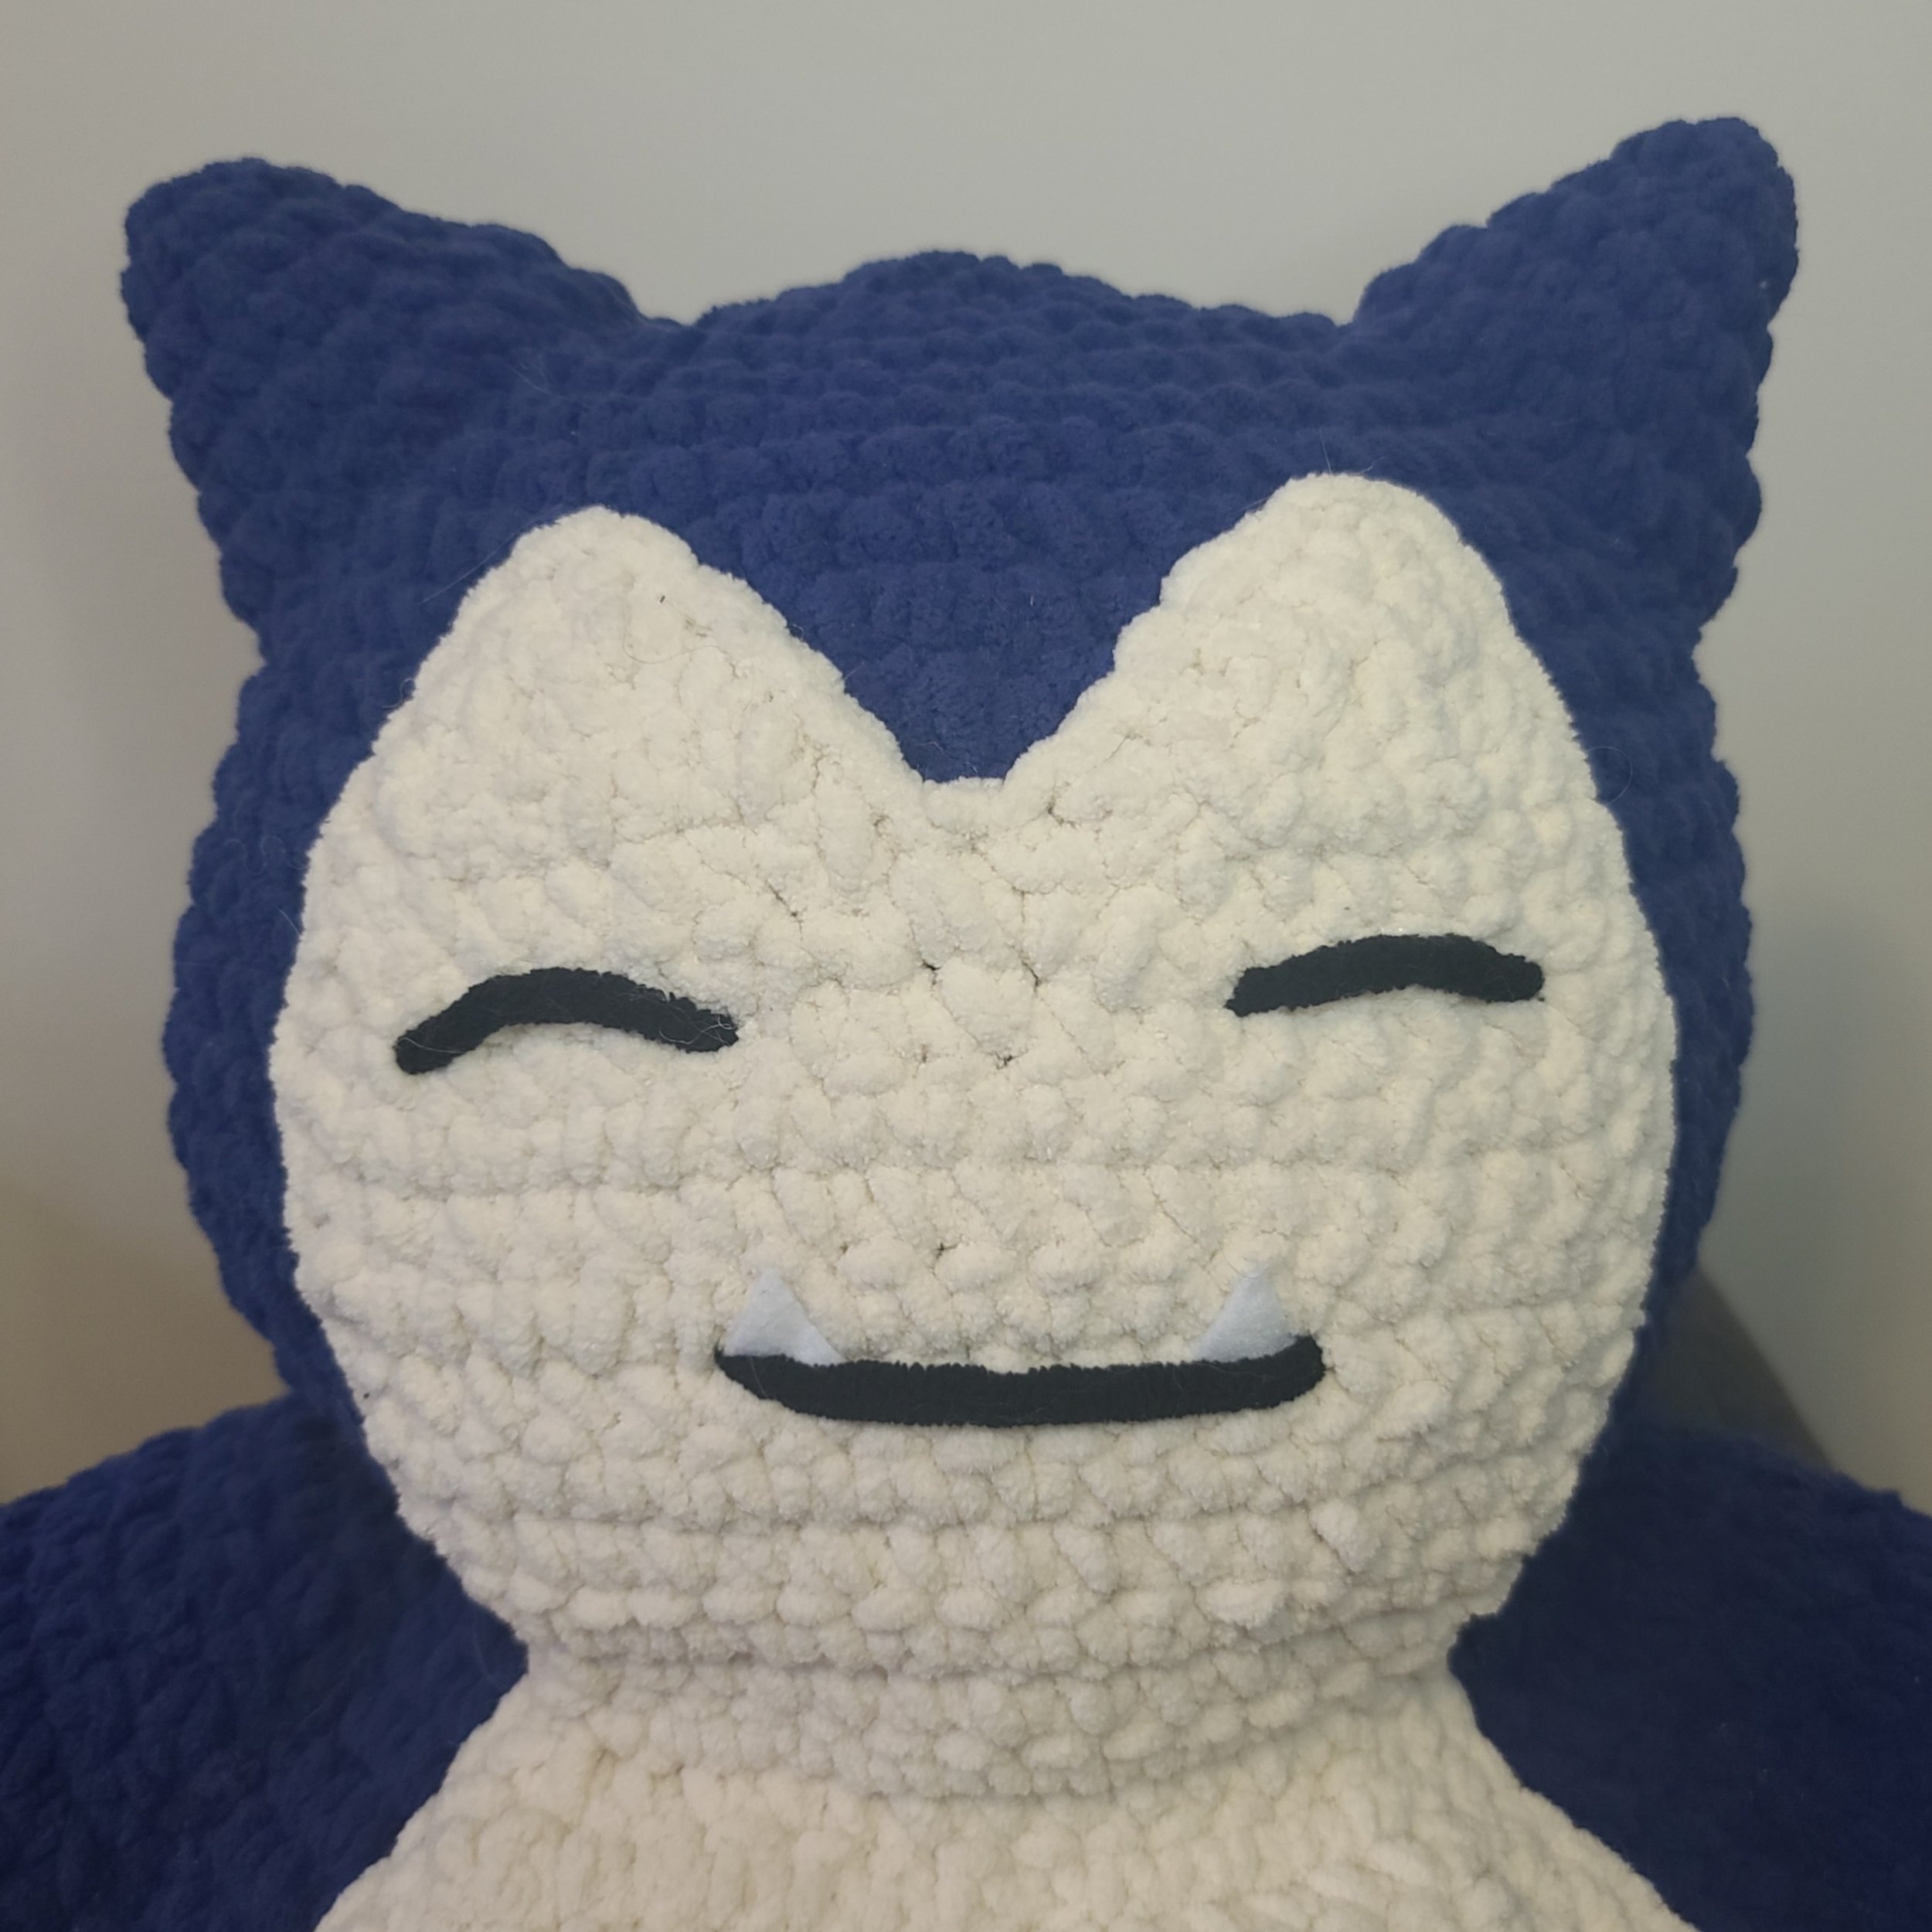
Using a piece of black yarn, embroider the eyes & mouth on the head part of the belly patch. You can VERY carefully use a tiny bit of fabric glue to make the eyes a bit rounder.
Cut two little triangles out of white felt for the teeth.
Glue the teeth near the mouth. The top parts of the little triangles should point upwards.
If you made it this far - congratulations, you’re finished! Hopefully your arms don’t hurt as much as mine did.
A bunch of finished pictures (with much less dog fur on them) are below: